Thursday, March 7, 2013

REI Jacksonville Opens

REI Jacksonville
Last weekend, I traveled the two hours north on the Interstate to the new Jacksonville REI store opening with my friend Walt.  We passed the time catching each other up on what is happening in our personal lives, talking about hikes and bicycle rides and about the REI store's grand opening and the items we would be looking for.  REI was offering a free water bottle plus a gift card they were to be handing out to the first 200 people through the door daily.
We arrived about 15 minutes before the store opening, and were aghast (and pleased) at the long line outside the store, winding clear across to the West Marine store at the far other end of the strip center.  As we entered the store, we were surrounded by REI employees ringing bells (bear bells?) in their hands, welcoming us inside.  The store was packed!  It was so tight we had difficulty maneuvering through people in some of the isles to look at merchandise.  As full as it was, the store employees were always smiling and were being helpful.  After about 30 minutes of tight passageways, most of that crowd had now moved into the long checkout line, which wrapped around the store from the hiking boots section to the registers.
The REI store is laid out in a large square with high ceilings and was constructed in a similar ecological way to the western REI stores I was familiar with in Denver.  The layout starts with bicycles in front of you and to the right, with camping gear in the middle of the store. Backpacks adorn the back wall behind the camping gear section with kayaks, car racks and bicycle repair to the right rear.  Footwear covers the left rear store section, wrapping through hats to clothing which filled more than the left third of the floor space.  The travel section is in the front of the store on that left side with the registers in the middle, near the front door.  The clothing section was loaded with all the basic outdoor brands and, of course, REI's own brand.  This was easily the largest section of the store with a good variety of styles and colors.  The restrooms are to the right rear beside the community service information area.  To see store photos without the crowds, check out Sandra Friends Florida Hikes! blog here.
I was slightly disappointed the store did not have a climbing wall, since REI began business years ago by a group of American mountain climbing friends creating a co-op in order to buy climbing gear.  I was used to the Denver stores having climbing walls and there may be space to add one down the road.
REI Flash 45 Backpack
I did find all the equipment I was looking for and have made some decisions since I have now "touched" the items.  The REI Flash 45 backpack will work just fine for future week-long and through-trips backpacking.  It has two zippered pockets in the lid and the support stays seemed to transfer weight directly to the hip belt.  The "regular" size was way too small for my long body, and I would require the large size so the waist belt would actually land at my waist.  The front outside pocket is one big pocket, attached to the far sides of the pack.  It will have to be loaded a little differently than it would if it had separate side pockets.  This was something the online pictures do not show well.  The waist belt pockets were a little smaller than I thought, but they will still hold enough gear to be useful.  The next time I go to the store, I will load it up with 25 to 35 pounds weight to see how it carries on my back while loaded.  
I also liked the REI Safari Adventure Touring bicycle with it's butterfly handlebars for nearly-infinite hand positions.  This will work for loaded bicycle tours and the paved multi-use trails and local streets I ride weekly.  While the REI Randonee has been my touring choice for many years, the Safari has improved greatly in the past few years to become a really well-made touring bicycle.  It appears both bicycles use the same 520 chromoly tubing frame, though I do not know that for certain.   I also checked into new bicycle shorts and shirts that don't make me look like I just rode in from the the Tour De France.
REI Safari Adventure Touring Bicycle
From all my years of accumulating stuff, there isn't much equipment that I need anymore in the camping gear section.  I did check out the Princeton LED light and some small containers for use in the health kit.  I was disappointed they didn't have a large selection of Florida national and state park maps, but maybe they didn't come in yet.  They did have many of the 2013 maps for the Appalachian Trail plus the current AT guide, and had planning books and maps of several popular national parks around the country.  
Overall, I am very pleased REI has entered the Florida outdoor retail market.  It is much better than driving 8 hours to Atlanta, Ga to "touch" an item.  For now I will drive the 2 hours to Jacksonville to do so.  While in the checkout line, we overheard an REI employee saying that the corporate group was closely watching this store's opening, to see if there is enough demand to open more stores in Florida.  I think they will find that there is more than enough demand to open 3 or 4 more stores throughout the state.  Hopefully one of those is in central Florida real soon!

Thursday, February 28, 2013

Hiking in the Rain

Sometimes the Cypress Trees ARE looking back at you!
My wife and I used to hike more often, way before the kids and jobs took over our lives.  Still, we can get out and enjoy life together.
Sunday was one of those days, where my wife wanted to record some peaceful outdoor videos for her web site and I also needed to get out on a short hike at the same time.  We drove to Spring Hammock Preserve which is nearby, after we had lunch and the morning rains had ended.  Temperatures were in the mid 70's and it was very cloudy.  I wrote about the old Cypress trees at this county park as More Big Trees last October.  We parked the car and walked a few yards to Osprey Trail, the road to the famous "mud walk" for elementary children living in central Florida.  A couple passed us on mountain bikes, but it seemed there was no one else at the park, it was so quiet.  The children from the mud walk were all gone from when we were here for a short walk last week.
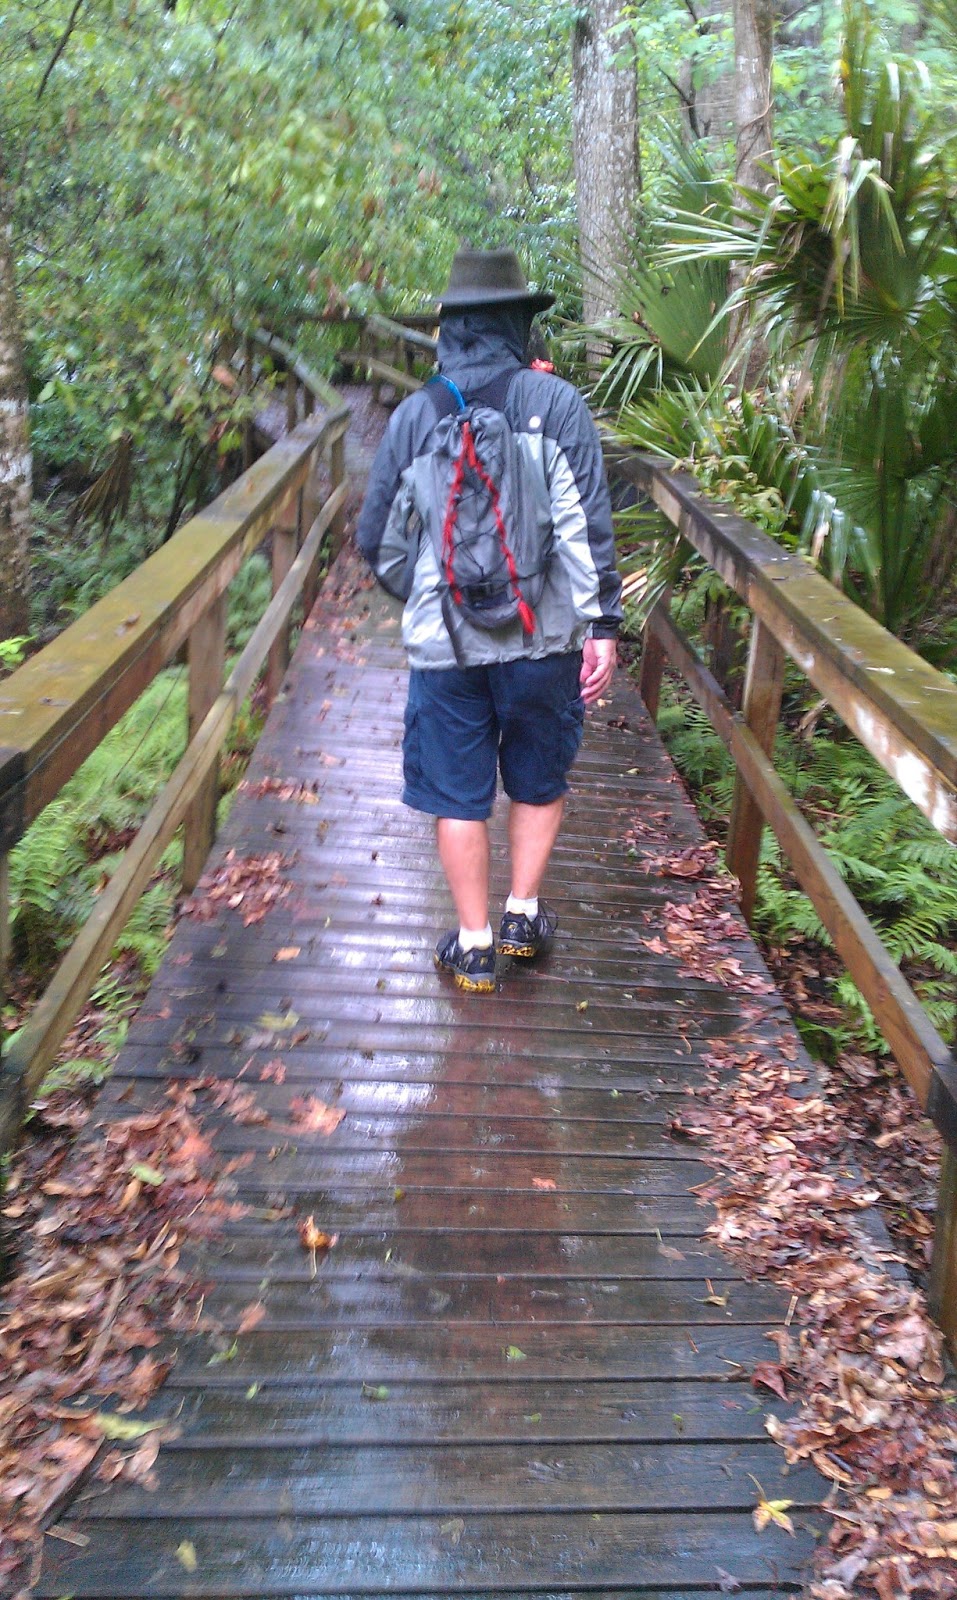
Along The Boardwalk In The Rain.
We stopped at a bridge over the slough (called a "sloo" around here) by Osprey Trail and shot a minute of quiet video in between the jet planes passing overhead.  More video was shot at the next slough crossing also.  We hiked on down to the wetlands area and followed the boardwalk to the left through a mixed hardwood swamp to a wonderful view of Lake Jesup.  With the low clouds, splatters of rain, and bird calls, the view was gorgeous, but it was too dark for good video.  The ancient Cypress trees along the boardwalk, with swarms of Cypress Knees around them were awesome.  I had not seen the many Cypress Knees the last time I was here because the water was over a couple feet deep then.
A Forest Of Cypress Knees.
We decided to return along the Limpkin Trail which follows Soldier Creek back to our parked car.  This section of the trail needs much maintenance work and we teased about the trail being closed, and that we didn't know about that.  While shooting video of the creek the sky opened up with rain.  My wife took the umbrella from my pack and I put on my hiking rain coat.  We have always enjoyed the solitude of walking in the rain, the peace and quiet, and the different perspective nature gives you when she is wet.  We then slipped and slid our way along the muddy trail to get to the way back to Osprey Trail on the Cypress Tree boardwalk.  The Limpkin Trail was much like hiking in the Smokey Mountains with all the roots and the up and downs and the greased mud slickness during the rain, back when we went there twice a year to escape the Florida heat.  The two mountain bikers we met at the trail junction were also slipping and sliding and pedaled back through the mud along the creek trail.
The rain eased off, but not until we had shot another video with the peaceful sounds of nature.  My wife was very pleased with the rainy hike on the trail.   "The rain just made it better", she said smiling.

Saturday, February 23, 2013

Backpacking Repair/Backup Kit

Small And Lightweight Repair & Backup Kit
Over the past few months, I have put together a small and lightweight repair and backup kit for backpacking and hiking.  It contains the following:
4 safety pins (pinned to the inside bag label), 10 Micropur water purification tablets (purify 1 liter each), 45 feet of 2 mm reflective EZC2 line, a backup mini flashlight, lens cleaning cloths (for my glasses) and extra zip-lock mini bags.  In 2 more small zip-lock bags are a book of paper matches, and some dryer lint for fire starting.  There is also a traditional, lightweight, waterproof backpacker match case, a P-38 military-style folding can opener and 2 four-inch strips of double-sided Velcro.
The rest of the repair kit is kept inside of a small zip-lock bag.  It carries 4 three-inch mini zip ties, 3 plastic clothes pins, 2 feet of duct tape rolled onto a cut drinking straw, a one inch and a two inch square piece of Tenacious Tape (for tent leaks), 3 wire ties and 6 rubber bands.
I used plastic drinking straws cut to fit for both the small roll of duct tape and the sewing kit needle-holder, since it is so lightweight.  Rubber bands are a great lightweight option to hold several of my camping items rolled-up until I need them, so spares are necessary.  The Velcro strips are great for attaching items to the outside of my pack and for holding items together.   The mini flashlight is temporary - I plan to replace it with a smaller and lighter weight Princeton Tech Pulsar II LED flashlight down the road.
Kit Contents - Safety Pins And P-38 Are Inside The Bag.  The Sewing Kit Is On The Bottom, Lower Right.
The mini sewing kit contains two needles poked into a cut piece of drinking straw (so you won't get stuck).   The needles are sized to hold the 2 feet of dental floss for secure sewing wrapped around the drinking straw, plus 4-6 feet of gray thread kept inside the straw.  I put this small sewing kit into a super-mini zip-lock bag to keep the pieces organized.
All my backup parts are kept here: backup fire (2 backups for my mini Bic lighter); a backup mini flashlight for my headlamp; and Micropur tablets to backup my water filter for 2 days.  I do not carry a backup knife or stove.  It all fits into a plastic-coated Eagle Creek small zipper bag that was leftover from my traditional backpacking days.
In my mind, I have just about everything covered for a typical weekend backpacking trip, mostly just to fix something so I can get back home.  In case I need more, there is also first aid tape in my first aid kit, my shirt came with 2 spare buttons sewn in, and there is more dental floss in my health kit.  For a through-hike I'll need to carry more repair items like zipper parts and specific pack parts that my tools and parts cannot repair.  I carry this kit for day hikes also.  Be wary of the weight of commercially available repair kits, as most are not meant to be made for ultralight backpackers.
What is most important here isn't just what is in your kit...it is what is in your mind on how to use what is in your kit to get out of a jam.  If I can't fix it with what I have, I'll have to drag it home, or get rained on, or do without.  I can open a can of beans with my single-blade pocket knife, but for 4 grams more weight, I can open that can cleanly with my P-38 can opener.  4 grams is about the same weight as all the labels on my clothing, pack and quilt combined.  I can purify water for two full days if I have to, and I can strap or tie most anything onto my pack.  I have sewn torn pack straps back on, taped holes in my tent and lit fires with my third tier of waterproofed matches during a storm.  I have had those experiences, and with some ingenuity, I should be able to fix most anything else.
The individual weights of my repair kit are:
Eagle Creek small zipper bag with 4 safety pins       1.0 ounce    26 grams
2 Velcro double sided 4-inch strips                         0.1 ounce     4 grams
Mini flashlight                                                          0.5 ounce    12 grams
P-38 military-style folding can opener                      0.1 ounce      4 grams
10 Micropur water purification tablets                      0.3 ounces     8 grams
Waterproof matches in case                                     0.5 ounces   14 grams
Dryer Lint                                                                Less than 1 gram
45 feet of 2 mm reflective EZC2 line                        1.3 ounces    38 grams
Paper Matches                                                        0.1 ounces      2 grams
2 Lens Cloths                                                          Less than 1 gram
3 Clothes Pins                                                         0.4 ounces    12 grams
2 foot Duct Tape Roll                                              0.1 ounce     4 grams
Rest of Repair kit items in bag                                  0.3 ounces    8 grams
Sewing kit                                                                Less than 1 gram
Remaining zip-lock bags                                           Less than 1 gram
Total repair kit weight                                               5.2 ounces    148 grams
There's room to carry more items inside the bag, if needed, since my repair needs seem to vary over different trips.


Friday, February 15, 2013

REI Store Comes To Jacksonville, FL

REI is expanding it's outdoor sporting goods stores into Florida with the first store to open here on Friday, March 1, in Jacksonville!  The store opens with a complete bicycle shop and provides paddle sports, outdoor clothing and gear and equipment rentals.
Store grand opening festivities include a free continental breakfast served Friday, Saturday and Sunday mornings, March 1-3 before the store opens.  They also have early shopper gifts with free gift cards inside, a free REI T-shirt for new members who signup there, and daily sweepstakes (drawings) over the weekend.  More REI information is here.


REI has been my provider of choice of outdoor gear since the early 1980's.  They were a family destination when we lived in Colorado where my children learned to climb in safety on their in-store climbing walls. I still buy backpacking gear there online, including some company label lightweight packs and clothing.  When you go, check out the REI Flash 18 and the REI Flash 45 lightweight backpacks for day hiking or extended backpacking trips. While I have not yet tested the 2 pound, 4 ounce Flash 45, it appears to have the light weight and features I need for future through-hikes.  I love my 9.7 ounce Flash 18 and use it on all of my day hikes and to carry my lunch to work.  You can read about my use of the Flash 18 on my blog here.
The new REI store is located on Jacksonville's southeast side, just off Butler Boulevard.  Driving from Orlando; go East on I-4 and north on I-95.  Outside of Jacksonville, take the I-295 bypass east and exit onto Butler Boulevard, highway 202, going west.  Turn right onto Gate Parkway North and then right onto Town Center Parkway.  Turn right at the second turn and REI will be just to the left.  Check the map here.
REI is also very connected to the outdoors in the markets they serve and they provide highly organized volunteer work for trail maintenance and ecological projects around the area.  If you have the time and inclination to volunteer outside, I can say my experience volunteering with them in Denver was very positive.  Check here for the next volunteer event at Hanna Park.  They are also reported to be a great place to work.  Don't forget about REI Travel and the in-store outdoor training classes.  The Jacksonville area is lucky in this regard.  I plan to be at the REI store at some point over the grand opening weekend to look around and to actually touch the Flash 45 backpack, something that cannot be done online.  If you go, please drive safely and have a great time!


Friday, February 8, 2013

Tent Stake Tool


It all started with an idea for a MYOG project...a tent stake tool.  For those times when the ground is just too hard to push the tent stakes in by hand.  For just 17 cents at Home Depot, I bought one half-inch PVC 'T' connector meant for a home irrigation system.  
I used my drill to make a small hole in the neck of the 'T' and tied a knotted cord through it to make the tool be twice as useful.  This tool weighs about 0.5 ounces or 16 grams with the cord attached.
The tool weighs just a little more than my blue aluminum tent stakes.  I have found blue to be the best color for not losing your tent stakes in the outdoors.  Forget about yellow, red or orange.  Try finding those stakes on the ground in the Appalachian mountains during the fall.  Blue just doesn't disappear as easily.  For those wondering about multi-use, these stakes are also good for cat hole digging.
The tool and stakes will travel in my backpack in this recycled Tyvek mailer. I have found rubber bands to be incredibly useful and very light weight for backpacking.
So, when pitching the tent while camping...
...I can use the tool to push the tent stakes into the hard ground...saving wear and tear on my hands...
...And in the multiple use department, I can also use the tool to pull the stakes out when taking the tent down...
My tent is an Alps Mountaineering Mystique 1.5, pitched here in my back yard for demonstrating how the MYOG tent stake tool works. 
The tent body weighs 24.5 ounces, the tarp 23.0 ounces, red poles 10.4 ounces, blue stakes 0.4 ounces each or 2.4 ounces for 6, or a total of  3.77 pounds using no stuff sacks.  Not quite ultralight, but lightweight enough for weekend camping trips.
It is spacious inside for one person with the convenience of  two vestibules and two entrances, and with the tarp on, it is very water proof in heavy rains and high winds.  The tent is also bug-free for us Floridians.  With the short end of the tent pitched into the wind for aerodynamics and the aluminum poles supporting the tent to prevent it from flexing in high winds, this is a very secure and stable, small tent.  Most nights camping, I have left the tarp doors open for ventilation and views.  It is also tall enough to sit up to dress or read in.
A tent stake tool like this one is an easy and simple MYOG project for anyone to make.  It has multiple uses and is lightweight and very inexpensive.  It took me longer to charge my drill battery than it did to actually drill the hole and tie the cord.  It is really good for places like stone-free Florida and for those hard forest floors, wherever you may find them.  
By the way, this is the second week of February, winter storms are hammering the north and we have a temperature in central Florida of 82 degrees today.  What's up with that?


Thursday, January 31, 2013

Lake Lotus Park

Hiking and fishing on the boardwalk along Lake Lotus
Lake Lotus Park is a 100 acre city park in Altamonte Springs, Florida.  Lake Lotus is fed by the Little Wekiva River as it flows out of neighborhoods and industrial areas and follows along the east side of the park.  The river continues it's flow in a northerly direction past Lake Lotus to reach the main Wekiva River before it reaches the north flowing St. Johns River.  The city of Altamonte Springs bought this piece of land in the southwest corner of the city in 1972 and developed and opened the park in 1995.  This park is perfect for individuals or families looking to de-stress for the day.
Roots are plentiful as are cypress knees
The best thing is the park is peaceful and very beautiful, and has fine trails built over five of Florida's ecosystems.  Here you stroll through the Sandhill, Pine Scrub, Mesic (between wet and dry) Hammock, Floodplain Wetlands and Lake Lotus communities, mostly on a well built raised boardwalk trail.  There is a fishing area and a covered window hut for bird and viewing wildlife further along the lake; shaded benches and sunny boardwalk along the Mesic Hammock and Floodplains Wetlands; and a dry wood chip highland trail in the Sandhill and Pine Scrub communities.
Across the lake are apartments and you can see parts of some homes to the north and west of the lake.  The highway noise is low, despite Maitland Boulevard passing adjacent to the park.  Birds were everywhere, from small jays, egrets and ducks to hawks, as were lizards, squirrels and signs of turtles and raccoons.  There are covered picnic tables with grills, restrooms, playgrounds and the quiet walks through nature.   The lake has floating lotus plants just past the Little Wekiva River outlet and around the north side of the boardwalk.  The hiking trail starts to the east of the central picnic area, and continues about a mile and a half as you walk in a counter-clockwise direction, returning you to where you began.  Shorter cross trails connect you back to the park center.
The walk around the outside of the boardwalk took less than an hour, but it was a peaceful hour.  While it was a little warm for winter, there were few bugs.  (I noticed bat houses located throughout the park.)  And there were no crowds for a Sunday afternoon.  A billboard shows photos of local dragon flies and butterflies.  You could easily spend a few hours here decompressing.
Mesic Hammock, benches are just around the corner
The park is used as an outdoor education center with interpretive programs offered throughout the year and Lake Lotus Park is staffed with trained park rangers.  Parking is across Maitland Boulevard just off Magnolia Homes road with a free tram ride over to the park on the weekends.  Entrance is free daily, they are closed Wednesdays.  Check out Sandra Friends trail description and park pictures on Florida Hikes!
To find Lake Lotus Park, take the Maitland Boulevard exit on I-4, just north of Orlando, go west 3 miles, after passing over highway 434, turn left onto Magnolia Homes Road, and left into the parking area.

Friday, January 25, 2013

Petzl Tikka 2 LED Headlamp Review

I am quite pleased with the performance of my Petzl Tikka 2 LED Headlamp.  For night time book and map reading in the tent, it works great on the low light setting.  You may have to tilt it up or down slightly to reduce glare on your Kindle screen.  I have not used it on the high lamp setting yet, I found did not need that much light around the campsite or for trail walking.  The headband was comfortable and adjusted easily while wearing it on my head for reading and close work.
Petzl Tikka 2 Headlamp
For night time hiking, I stuff the headband under my belt and aim the light from my waist.  It has worked well for a short walk along a trail, though on a longer walk I may need a more sturdy way to attach it to my waist or belt.  I have also carried it in my hand, like a flashlight, and have been pleased with the headlamp's performance.  While the bright setting was too bright for my slow trail walking style, it may be too dim for running or bicycling with no other lights.  Those lights sold for running and bicycling usually have almost twice the brightness of this one.
There are also accessories available like the Adapt Tikka 2 system that includes different light fixture parts (on the back) that attach to shirts, belts, helmets, just about everything.
As for the battery life, I'm still on my first set of AAA batteries, so I'll have to say it seems to be doing well.  We'll see how that goes after a few sets of batteries, though the user reports online look good.  I generally carry a spare mini flashlight (0.4 ounces), so I won't be stranded on an over night backpacking trip due to dead batteries.  For longer trips, I'll just replace the batteries before I start.
I see how the strobe selection can be used for calling for help, but I wouldn't walk with it in strobe mode at night.  For a kayak or canoe at night, the strobe will keep you seen by most other watercraft.  Walking along a highway in daytime, the strobe will help you to be seen by motor traffic.
I do wish the headlamp had a lower light setting, like 5 lumens, or a red LED lamp for after dark chores around the camp.  The Tikka 2 headlamp has 40 lumens of light or lights up 95 feet on the bright setting and 10 lumens or 42 feet on the low setting.  That's about an hour and a half of battery on high and two hours on the low setting to use the manufacturer's information.  It would also be nice if the headband was easily removable without having to cut the plastic frame.
My older ultra-mini headlamp had only one LED and 3 light settings plus strobe.  While it wasn't bright enough for night time trail walking, it had a low enough power to not blind others in camp, and had a clip for placing on a hat bill when you removed the headband.  I found out the year after I bought it that the coin batteries it used cost a lot more than the whole headlamp did, just for replacements.
At 2.8 ounces, or 80 grams with 3 AAA alkaline batteries this headlamp is lightweight enough for me.  With lithium batteries it may weigh a little less.  REI has it listed online at 2.9 ounces.
At REI the Petzl Tikka 2 was just under $30, which is an OK price.  It is an ounce lighter than my trusty old AA mini-mag flashlights (at 3.8 ounces each) and seems to provide the illumination that I need for overnight backpacking trips.  In time, I'll acquire a headlamp with a red LED or lower light levels.

Saturday, January 12, 2013

Hiking during Florida's hunting season

Hunting season and Hiking season are held at about the same time during Florida's best season to be outdoors.  That means wearing a blaze orange vest or an orange hat and making noise while hoping for the best when hiking or backpacking.   Alas, if you are considering hiking in a water management area, wildlife management area, state preserve, state forest or national forest (like the Ocala National Forest), hunting is permitted and there will be people shooting firearms.  That is unless you are hiking in a place where there is no hunting allowed.
Wear your blaze orange vest when hiking during hunting season.
You may remember I brought this up last year when hiking the Kratzert Tract along Lake Monroe, I had left my orange vest at home and ended up borrowing one from some very friendly hunters.  You also may remember my wife was not too happy with me about hiking in hunting season.
Florida hunting season dates for 2013 vary by zone with General Gun Season (AKA: Deer Season) running through January 20 in zone C and through February 17th in Zones B & D.  Central Florida lies in zones C and B.  Quail hunting runs through March 3.  Then there is turkey and gray squirrel hunting and all those other animals like Coyote that people are allowed to shoot almost year-round.  You must look at the State Hunting Date site here to get an accurate picture.
The good news for hikers is that hunting is not allowed in State parks, State recreation areas, county parks or county-owned land like the Lyonia Preserve in Deltona.  The other good news is a lot of the state parks hiking trails were built and are maintained by the Florida Trail Association volunteers.  I had a little experience with them last fall, and I am impressed with the quality of the trail work.  You have to understand the Florida year-round growing season, with almost continuous plant growth because there is no winter weather here and few freezes.  This results in almost constant trail maintenance.  Otherwise, the trails here would just disappear in six months.
So here's a list of hunt-free State parks with hiking trails, many also with primitive campsites along those trails.  While none in the state have very long trails except for Mayakka River State Park, you can still backpack out and enjoy a night of camping with a good bit of walking to and from the trailhead.  These parks are listed on the Florida Trail Association web site.  All overnight camping will require reservations.
Torreya State Park
Suwannee State Park
Wasington Oaks Gardens State Park
Bulow Creek State Park
DeLeon Springs State Park
Hillsborough River State Park
Little Manatee River State Park
Wekiva Springs State Park
Rock Springs Run State Reserve
Lake Kissimmee State Park
Mayakka River State Park
Seabranch Preserve State Park
Collier Seminole State Park
Get out and enjoy!

Friday, January 4, 2013

Outdoor Blogger Network

I was just added to the Outdoor Blogger Network web site under the Hiking and Backpacking section.  This broad based site covers almost everything outdoors from fishing to hunting, birding to conservation, kayak & watercraft to photography, and much, much more.
Please click here to check out the site.
I'm listed under Lightweight Backpacking
I'm on page 13 of the Hiking and Backpacking section for now.  I am with good company on the site with bloggers I read regularly, like Section Hiker, Stick's Blog, Brian's Backing Blog, Guthook Hikes, The Smoky Mountains Hiking Blog and others that I follow, plus there are so many new writers to read.
This is so cool, where I am now featured on two networking sites, the Outdoor Blogger Network and on the Hiking Blogs Directory.
Thanks to everyone who has visited me through the Outdoor Blogger Network!
My gratitude and warm thanks go out to Rebecca Garlock and Joe Wolf with the Outdoor Blogger Network, and Philip Werner with the Hiking Blogs Directory!  Big thanks to readers of these sites who checked out my blog and keep coming back!

Thursday, December 20, 2012

Happy Winter Holidays!

I'll be spending quiet time with family and friends throughout this winter holiday season and will get back with fresh posts after the New Year's holiday.

A Florida-style Christmas tree on the Seminole-Wekiva rail trail at the Jones Trail Head.
Tree courtesy of "Heathrow Biker Chicks."

May you and yours enjoy the finest tidings of this special winter holiday season.
Have a Merry Christmas and a Happy New Year!

Thursday, December 13, 2012

Staying Organized

In backpacking, staying organized on the trail usually means using multiple color and style stuff sacks to keep your stuff organized.  I learned that trick in 1971 while packing for Philmont and have used it for decades.  In ultralight backpacking, that usually means using various-sized zipper-type plastic bags or odor-proof bags to store tools, food and "smellables" along with a stuff sack or two.  With fewer bags, I've had no problem finding anything yet.
Red Mesh Stuff Sack - My "pocket items".
So why is the top bag sitting in my day pack a bright red mesh stuff sack?  Because that bag holds my "pocket items".  The items I will carry in my pockets for the trip.  When I arrive at the trail head and before getting out of my car, after spraying the bug spray on my legs, and slathering sunscreen on my face, I fill my pockets and leave the empty red stuff sack in the car.
This stuff sack keeps me from the panic of looking for my "pocket items" at the last minute, and allows me the time to organize them at the end of the previous trip.  It is so much better than reaching for my knife on the trail but not finding it.
Weight-wise, I add this amount to my clothing, hat and shoes for total "carried weight", like with skin-out weight.
So, just what goes in my pockets?
Pocket knife
Bug spray
Sun screen
Handkerchief
Liquid hand sanitizer (very small to small sized, trip dependent)
Moist towelettes (2 or more in small zipper-type bag)
Compass/thermometer (or a more detailed compass for navigation, trip dependent)
Small wallet for essentials (packed that day)
Car key (house keys left at home)
Snacks (packaged that day)
Pocket items.  Missing is the sun screen, it is on the list to be replaced.
I also carry money in the stuff sack for trail head parking fees.
For pockets on the trail, I wear a long sleeve nylon fishing sport shirt with big front pockets and a pair of nylon trail zip-off pants with leg pockets, and side and rear pockets.  Everything has a particular place.  For example, when I need to check the compass direction I reach for my left chest pocket.  My knife is always in the right side hand pocket, and so-on.
Rewind to the 1980's...I used to wear a photographers vest in place of a day pack for my hikes.  It was quite convenient.  My poncho went into the back pocket, I carried a water bottle on a strap over my shoulder, and my camera gear and everything else found a home in the vest pockets, of which there were several.  I wore this vest through the early 1980's to the mid - 1990's on occasion until I moved on to a choice of backpacks, hydration packs or a waist pack.  It was a nice warm layer on cool days but not too hot except on the very hottest days (I'm talking about hiking in Kentucky, Tennessee and North Georgia).  I must have been a character to see hiking along with my stuffed vest, hiking boots and heavy camera gear.  But I'm still using the same pockets to hold the same things some 30 years later.  My, how life has changed and how it hasn't.
Back to the present...At home at the end of a day hike, I remove my water bladder and any other water bottles and wash and dry them, make a list to replace anything I've used, get a clean handkerchief and then empty my pockets, putting all that back into the red mesh stuff sack to be ready for the next trip.
Of all my organization tricks, this one seems to serve me the best.  It allows me to add water and food, grab my day pack and go quickly.
For backpacking trips, I expect things to take longer to be organized, but my "pocket items" are already done.  I just move the stuff sack from one pack to the other.  The bright red color helps me to make sure it is there before I cinch the top and go.


Saturday, December 8, 2012

Solio Bolt Solar Charger

My first interest in purchasing the Solio Bolt Solar Charger came from pictures out of hurricane Sandy's recent destruction in the northeast.  The photos were of hoards of cell phones being plugged in bunches on sidewalks, piled in window displays, grouped in cars, stacked at lunch counters...jammed anywhere there was electrical power available to recharge their phones.
Hurricane Sandy cell phone charging jam
We have power outages in Florida, from natural disasters like hurricanes but also from storms and failed electrical transport equipment.  Maybe in the future even from a computer hacker.  When two critical neighborhood transformers blew this week, my wife's first question was, "Is your new solar charger 'toy' charged?"  "Yes," I smiled. "It is."
So why this model?  I had been looking online at solar chargers for some time and found this one was relatively inexpensive, selling for $65 online.  The Black Friday REI sale took 25% off the price, so I ordered it.  For my $45 I got a reasonable solar charger and a lithium battery, which is said to hold a charge for about a year.  The manufacturer says you can usually get two full cell phone charges from a full battery, then either plug the charger back into your computer USB port or an electrical outlet or setup the solar panels in full, unobstructed sunlight to recharge it.  It weighs 5.3 ounces or 150 grams, about what my cook kit weighs.  Add in the 0.6 ounce cable for a total of 5.9 ounces.  Unfortunately, the Black Friday sale is over.  Here is the REI link for the Solio Bolt.  The Solio website is here.
Solio Bolt Solar Charger and included USB cord
In reading users online posts, I can tell there are varying levels of success in both charging devices from the Solio Bolt and in recharging the units battery.  I expected my mileage to vary due to different phone types and the local tilt angle of the sun, but I was surprised at the wide angle of solar alignment the Bolt can handle during charging.
So after our first full battery charge, we have charged my wife's Google-style HTC smart phone, once, while it was turned on, leaving 2 flashes of light or about 40% charge remaining (20% per flash).  If that is true, it took 60% of the battery to fully charge her phone one time.  Since she has to recharge daily to use all her smart phone functions, it may be difficult to keep up with her needs during an extended power outage, much less keep my phone charged also.  We tried charging her phone on the remaining battery the next day and got a 75% charge.  Enough to work, but not 100%.
I'll test it with my work phone next, a Blackberry Curve.  Fortunately for us, both phones work with the included micro-USB cable that came with the solar charger (my Kindle Touch works also).
My work-provided Blackberry phone charged, and while still powered on, charged and charged until the Bolt was discharged after 6 hours.  About 4 hours in, I looked at the Blackberry charge meter and it was full but the unit was still charging.  Bad for sharing.  Then I recharged the Bolt battery and tried again, this time with my work phone turned off. The phone completely charged in one hour, but it did not turn off the charger.  For all future phone charges my suggestion is the phone must be turned off.  This left a 60% charge in the Bolt battery.
My Kindle Touch drained the Bolt's entire battery and got about an 85% charge.  I had turned the wireless off.  Long enough to finish a story or check email since the Kindle charge can last a month or more.
How it works:  the Solio Bolt has two solar panels, hinged to open them both to the sun.  The included pencil allows you to prop the unit up to the right tilt height for the local sun (the pencil is slick and may need to be roughed up a bit to actually hold the Bolt in place).  Check here for your local sun tilt level and scroll down to fill out the form.  It also has covered USB plugs, a micro and a regular-size plug on the battery unit.  The micro USB connector is for incoming charges, like from your computer or an electrical outlet.  The regular-size USB port is for outgoing charges to your devices.  When the Bolt unit is being charged, the single LED button on the back glows red, turning off at 100% battery charge.  To charge your device from the Bolt charger, connect the outgoing USB cable, then press the single LED button once.  It will flash the charge level and then begin charging your device, flashing green as it charges.  This may take a minute or so, but in our case the phone came to life, just like it was being charged in an electrical outlet. Once charged, the green flashing light goes out and you press the LED button again to turn off the charger, then disconnect the cable.
From the website:
Max Wattage: 5 Watts
Discharge Rate: Fixed 5V, 1,000mAh
Charge Rate: 5-5.5V 450mAh
Charge Time via USB port/wall charger: 4 hours 30 min.
Charge Time via Sun: 8-10 hours
Battery info:
3.7V/2,000mAh Li-Poly - User replaceable at end of life (average 3 years)
Solar charging the Bolt on top of my garden composter.  Note there is no shadow from the pencil.
To charge in the sun, I used a place in our yard where the sunlight was unobstructed (it won't work under polarized glass and is reduced under pool enclosure screens and intermittent shade).  I just used the included pencil that comes with the unit and aligned it so there is no shadow from the pencil onto the front of the unit.  My results were the Bolt was almost fully charged when I checked it at sunset in 4 hours.  Since the sun had already dropped below the treeline when I got to it, the unit was not charging at that time.  It read 4 flashes or an 80% charge and started with 3 flashes or 60% charged battery.  The unit should completely charge the battery from no flashes to full 5 flashes in the sun in about 10 hours.
Note pencil shadow after 3 hours charging...even though the sun's alignment had changed, the unit was still charging!
For recharging by the sun on a moving backpack with varying degrees of shade, my expectations have improved.  I did figure how to dangle the charger at near the correct tilt over the back top of a backpack using mini bungees and cord locks.  There is the tree cover, either solid or intermittent shade, usually both,  that can hamper charging.  During breaks you can position it properly on your pack or on the ground.  The unit does charge sufficiently and I expect it would charge more so in the desert southwest or even above treeline, than in the southeast subtropical scrub.  Please let me know your real-life results.
My Blackberry USB Outlet Charger
Currently, solar panels like this one are designed for a relatively fixed location.  To change them to a mobile receive-sunlight-from-all-angles design would require a market for that specific use, one I think is coming.
The north-bound through-hiker cure for the AT would be to carry a multiple-outlet USB wall charger, and to recharge the solar charger battery (or any USB devices) while shopping and washing in a town at an electrical outlet every 5-6 days.  Then you would have two power recharges (one for your phone every other day) and if you kept your phone off between towns you may get many days between charges.  There's also your GPS, camera, e-reader or tablet to be charged, along with headlamps, video cameras, water purifiers, i-Pods and who knows what so plan well and test in advance how you will charge everything before a long backpacking trip.  My Blackberry USB wall charger weighs 0.8 ounces or 22 grams, so it is quite lightweight. You could also solar charge on clear sky zero days, but then we don't usually plan for (or get) many of those days when ultralight backpacking.