Friday, June 27, 2014

Ocmulgee National Monument

Ocmulgee National Monument Visitor Center
Today's hike is not far or difficult, and it is very interesting.  Starting at the Ocmulgee National Monument Visitor Center, the first hike was just less than a quarter mile down a hill, across a bridge, and back up into a field.  Tall trees surrounded the hill and I climbed to the bottom of another smaller hill with an entrance door on the east side.  This is a restored earthen lodge, and by ducking (a lot) you go through a low tunnel for about 20 feet to enter a log roofed underground room.  It reminded me of the Kivas I have seen out west. This lodge was originally built for discussions between a tribe's leaders with a fire pit in the center and a raised bird-shaped area (eagle) with another 47 seats around the outer wall.  3 seats are at the bird-shaped area, reserved for leaders.  On February and October 22nd, the sun rise shines through the tunnel directly on a spot above the bird-shaped area, marking the equinox exactly.  You have to expect this would begin a huge party, and you may be right.  This is in Macon, Georgia, and the clay floor of this lodge is dated to be built around the year 1000.  At some point the roof burned and the site became buried until found by archaeologists in the 1930's during the largest-ever dig site in America.
The trail to the earthen lodge
The bird shape where the chiefs sat.  The sun strikes this twice annually on the equinoxes
Lodge entrance from inside the mound
The Monument has 7 other mounds, one being the largest Mississippian mound constructed on the Macon Plateau in the Eastern United states.  Your hike to the Great Temple Mound is over one half mile from the visitor center and it passes through the ancient village site, under a railroad track and around a trading post site built in 1690 by English Traders to trade with the Creek Indians.  A boardwalk and stairs climb the east side of the mound to the flat top.  It is about 2 acres of space up here with awesome views all around the compass.  The city skyline of Macon peeks above the trees to the west, while the view south is clear of buildings and only has a couple radio towers poking through.  Mississippian Chiefs lived here in rectangular wooden structures and it is thought they held important religious ceremonies atop the tall mound.  A dragonfly wisps by and birdsong is very loud.  A Lesser Temple Mound is right next door and the Funeral Mound is close by to the northwest.  Below the stairs the land falls away to Walnut Creek and wetlands where the creek meets the Ocmulgee River.  The River and Opelofa trails run from the Great Temple Mound to the river and through the wetlands and woods.
The Great Temple Mound, largest earthen mound in the eastern US
The view south...
And northwest showing the Lesser Temple Mound and the Funeral Mound on the left
The Bartram (as in William) Trail runs east and south from the Visitor Center and loops back by the Southeast Mound and ends at the start.  Bartram came through here, meeting with the Creek Indians and wondering in his writings about the history behind the mound builders.
If you are into Civil War history, Macon was never taken by the Union Forces in a battle, even though it was the major manufacturer of guns and munitions and held many Union Prisoners of War.  The Ocmulgee National Monument also has Dunlap Mound which is near the Dunlap House that ran a slave-based plantation here during the Civil War.  The Union forces under General Stoneman (reporting to General Sherman) setup here and fired cannon over 2 miles into Macon from the Dunlap Plantation.  For some Macon irony, the local militia ended up capturing and imprisoning General Stoneman with the POW's he came to rescue.  If you visit Macon, make sure to see the Cannonball House, that General Stoneman's troops hit with a shell that did not explode while bombarding downtown.  There are also Civil War trenches and earthworks dug around the Monument, each with stories.
View east from the Great Temple Mound
The Heritage Trail is paved for runners and cyclists and it runs from the Park west to highway 80 and across the Ocmulgee River into town.  I like the way this ties the National Monument to the city and from the bicycle traffic in the park it seems the city has accepted it well.
The Visitor Center stores and displays over a quarter million artifacts gathered by the archaeologists mentioned above.  Lots of pottery, shell beads, Clovis and arrow points and copper from the past 17,000 years (that's not a mistake) of mostly constant occupation by Paleo-Indian, Archaic, Woodland, Mississippian, and the Historic Creek Indian cultures.  It also has the film "Mysteries of the Mounds" which focuses on the mound building time from 900 to 1100.
Funeral Mound signage
Park entrance is free and it is open 9am to 5pm every day except December 25th and January 1st.  There is a picnic area and camping is 8 miles west.  It is located at 1207 Emory Highway in Macon.  From Orlando, take the Turnpike north to I-75, and stay on I-75 to arrive at Macon, about 6 hours later.  Once in Macon, go east on I-16 to the first exit and follow highway 80 to turn right onto Emery Highway.  Turn right into the Monument.

There is much more to do in the Macon area, including historic house tours, Allman Brothers Band Big House tour, road trips to High Falls State Park, Lake Juliette and the town Juliette (Fried Green Tomatoes movie location), several plantations nearby and much Civil War history.

Friday, June 20, 2014

Bicycling a missing link

Volusia County just completed a 2.5 mile, mostly sidewalk connection between the Spring to Spring Trail and the East Central Florida Regional Rail Trail.  This short section connects Gemini Springs with Green Springs, and gives bicyclists about a 20 mile out and back ride to where the Osteen Bridge is currently under construction over highway 415.
A trail bicyclist used to have to ride in sometimes heavy traffic with no bike lanes to pedal this busy section, so the sidewalk is very welcome!  This road is named Dirksen Avenue west of the Interstate and is called Debary Avenue on the east side.  Building a trail along this missing link is awesome!
Trailhead, just off 17/92
I bicycled this new section today, and despite the heat, it was a pleasant bike ride.  I parked at the gravel trailhead just off highway 17/92 in the shade.  The first section along Gemini Springs Park is well shaded.  The path splits directions around rocks a couple of times and it curves a bit, keeping your speed low around park entrance and exit crossings.
Beware the mileage markers along the trail may be confusing.  I never saw the 0 mile, and somehow gained half a mile between both trails.  The miles count down from 4 out of Gemini Springs and then count up from Green Springs.
Trail splits in Gemini Springs
Where the trail previously dead-ended and turned left to climb to historic Debary Hall, the new section continues ahead, built as a wide sidewalk along the busy street.  There are some restaurants and convenience stores located across the street.  It soon comes to where the Interstate bridge crossed the road and the railroad line.  The sidewalk is paved under here, just a little away from the traffic.  It then passes by a Park-and-Ride lot, and continues along, next to the street for about a mile and a half, until the trail turns into the trees.
Where the trail used to end, new trail continues ahead

Under the I-4 bridge where the railroad used to run
About a block after the trees, Green Springs is on the right.  The trail then climbs a bit and continues along until it dead ends in about 5 miles.  I have written about this trail here before, so I won't repeat all of that.  It does dead end at the base of the new bridge construction which will cross the recently widened highway 415 in Osteen, just north of the almost famous Osteen Diner.  From there it will continue to the next stop about 5 miles away.  Plans call for the next 50 miles of this trail to become a major portion of the cross Florida bicycle trail.  I understand funding is approved and construction on that section will begin next year.
Where I used to begin the trail
While hot, today's ride was pleasant because of the clouds and light breezes.  I saw an eagle in its nest and a turtle crossed the trail in front of me.  Where the trail has shade it was nice, but the last couple of miles near Osteen are wide open and the heat was increasing.  It is also very hot when crossing the boardwalks along the trail.
In total the trail ride was 19.72 miles long.  The trail gained 482 feet (surprising) riding out and back.  I didn't ride very fast and stopped every 10 minutes or so for a drink or to take a photo, so it took me over a couple hours to complete it on my mountain bike.  I used an app called MapMyHike on my iPhone for the first time, and I liked how it worked.
To get here, take I-4 East from Orlando.  Cross the St. John River and take the next exit, 108.  At Debary Drive turn right (west) and drive just under 4 miles.  Turn left into the trailhead just before you reach the stoplight at 17/92.
When the Osteen bridge is finished in August, I'll bicycle over that part of the trail (on a cloudy day).
Osteen Bridge construction, maybe finished in August


Friday, June 13, 2014

More ULBackpacking Items

There are many more Ultralight items I use when backpacking aside from the backpack. Here's a list with photos and why I chose them.  Beware, these choices are all mine.  No one has paid me with money or promotional items to advertise.  You will find that discussing your stove or pocket knife may start a small war, as people have many differing ideas about what they think is best.


Starting with the second Big Three, I chose a Thermarest Alpine 35 degree sleeping blanket (I call it my quilt) since in a typical sleeping bag you crush the loft below you, greatly reducing its insulation capability.  Loft is what keeps you warm in a sleeping bag.  I decided I didn't want to pay for that crushed layer of down, so I went with the quilt which is open at the bottom.  It does snap closed around my feet and has draft tubes along the sides.  Even though I move a lot when I sleep, my moving around has not left me cold. This weighs about 1 pound and is unfortunately is no longer made.  There are many other sleeping quilts out there.  For 3 season ULBackpacking in the east, go with a 35-40 degree quilt.  For trips out west or winter camping, look into a 20 degree quilt or a lower temperature rating.  The Sleeping System includes the quilt, the sleeping pad and any clothing you sleep in, inflatable pillows, bags to carry stuff in, etc.

Sleeping Pad - I have tried inflatable pads before and liked them very much.  Here I wanted to try a simple air-free pad again and the Z Pad Lite Sol small (51") was my best choice.  It is called a Z Pad because of how it folds up.  It has a silver side, which is to reflect your body heat back up at you in cooler temperatures.  It is also a little thicker than the other pads I tried, and is just thick enough to work for me.  It fits folded into a U shape inside my pack.  Mine weighs 10 ounces.

Water Filtration & containers - Hands down the Sawyer filter is the best yet and it beats my hand pump filters in every way.  The newest model is one ounce lighter than mine and the bag it comes with is supposed to be an improvement also.  In all the years I have hiked outdoors, I have filtered water by either chemicals, by boiling, or by pumping.  Now I do it by just passing unclean water through this filter.  Mine weighs 3 ounces, the new ones 2 ounces.  Save your chemicals for a backup.  As mentioned in a previous article, I carry two 1 liter Gatorade water bottles, two 1 liter Platypus soft water bottles (rolled up in my pack) and the 1 liter collection bag with my Sawyer filter.  5 Liters will carry enough water for a day.  Any containers you use to collect or carry water would be included here.

Cook kit & stove- My wife bought me this awesome titanium cup at a local outfitter for a Christmas gift a couple of years ago.  I am still very pleased with its light weight.  My cook kit includes this pot with my cup and stove below packed inside it, photos below.  Weight 4.8 ounces.  There are many lightweight aluminum pots & stove kits available that won't cost you as much and weigh about the same.

My Esbit stove is not sexy or sleek, but is is light enough and with some home-made foil wind protection it works very well.  It also carries 6 Esbit tabs inside of it and folds into my GSI Insulated cup (no longer sold) which fits into my pot.  Weight 3.25 ounces and it cost me under 10 dollars.  Other items not pictured; a cozy to keep my freezer bag dinners cooking and a long handle titanium spoon.


The Extras, those item you need to take, but not really weighing a whole lot, are included here.  Once you have purchased the Big Three and the Second Big Three, this is the section where you can constantly tweak the weight in small increments.
Headlamp - This Petzl Tikka2 headlamp has worked well for me, and is lightweight and easy to use.  I would prefer one lower light setting, but otherwise, it is easy on batteries. This headlamp goes in my daypack also for emergencies.  Weight is 3 ounces.
Spares - I carry this same kit on day hikes and backpacking trips.  It has everything I need and gives me 2 more ways to make fire, 1 more way to purify water, and 1 more way to illuminate the night.  I also carry a first aid kit which I have modified slightly for my needs. Here is the Blog story on Spares Kit  that I wrote a while back.  The only item I have added to my kit is a mini disc for signaling for help.

Pocket knife - My blog on Staying Organized is a highly read one and includes my ultralight pocket knife, a mini compass and all the stuff I carry on every outdoor trip.  My knife is a Gerber LST and it weighs 1.2 ounces.  I like it because it fits my hand well and it feels like a 'real' knife.  Everything in this kit goes with me on all day hikes or backpacking trips.  The red bag keeps it in my view when packing so I don't forget it.
10 Essentials - I have already covered the '10' in a post here and I won't go into how important is is to carry your own 10 essentials on every outdoor trip, even on short hikes. If you have not yet learned how to take care of yourself outdoors, maybe you should take a class taught by a first responder, as they should be able to convince you why you need to carry this stuff.  Here is a link to REI's 10 Essentials.
All of my ULBackpacking gear also translates into canoe or kayak camping and bicycle touring.  I would substitute the backpack for water-proof bags in the boat on the water, or lightweight front panniers on the back rack of my bicycle.
A lot of my outdoor knowledge came from my time in Boy Scouts, both as a boy and as an adult training boys to be leaders of men.  The rest of it came during camping, backpacking, canoeing, and bicycle touring trips from the 1970's to now.  I have learned and unlearned a lot in those 40+ years.
And that is how it can be there for you too, by going out there and doing it.  Nothing teaches you better than failing a few times on your own.  The idea is to go with someone who knows how to ULBackpack and is someone who won't leave you there to suffer alone.  The main point is to just go.

Friday, June 6, 2014

A day of ULBackpacking

This week we will cover more of what a "typical" Ultralight Backpacking trip in the southeastern Appalachian mountains could be like.
Appalachian Trail
So I would drive to the trailhead as early as I can, to get an early start ULBackpacking.  I'm planning on a single overnight, out-and-back hike into the northern Georgia mountains along a well blazed trail.
Let's say I get to the trailhead around 9 AM, put on my pack and start walking.  From my research, I know I start crossing year-round streams after 7 miles.
I would be carrying my usual base weight of 9.5 pounds, plus 2 pounds of food and snacks, 4 ounces of Esbit fuel and 2 liters of water at 4.4 pounds.  My 35 liter pack's total weight is 16 pounds.  It feels like a daypack!
It is a clear, cool day today and I walk at 2.5 to 3 mph, ascending the mountain, my normal pace.  At about 40 minutes I stop a couple of minutes to "smell the roses" and eat some snacks.  That gives me a nice energy boost, and I crank along another hour and a half to the first stream of water on the map.  I check the map and notice I'll cross this stream again in a few yards as I zig and zag my way up the mountain along a switchback because I would rather drink water that has not been hiked through.
I would continue along the trail to the next (and last) crossing of this stream.  It is warming up, but not hot enough to start sweating yet.  This area is along the side of a mountain, and the 1 foot wide stream flows easily as it drops across rocks and across the trail.  From my outside pack pocket, I remove my Sawyer filter bag and an old plastic cup I use for capturing small amounts of water from shallow streams.  Using my hiking stick, I check for snakes and poison ivy/oak/sumac (always!) and move a bit upstream and above the trail.
I dip the water slowly from an inch-deep basin, being careful not to stir it up and make the water cloudy.  I pour it one cup at a time into the Sawyer bag.  Once the bag is full, I return to the trail.  Here, I remove the filter from my outside pack pocket, screw it onto the bottom of the bag and allow the water to flow through and into my now-empty water bottle.  Once done, I attach the lids, return the filter, bag, cup & bottle to my backpack.  Then I reshoulder the backpack.  This has only taken a couple minutes.
While the foliage here could be wonderful, there are no views or areas to sit, so I continue hiking along.  Presently, I would come to an overlook on the left where I can sit and take a 30 minute break and enjoy the view.  And what an awesome view it is of mountains, stacked upon mountains, rolling off endlessly into the haze.  I check the map, note my next water availability near a shelter some 5 miles ahead and plan to eat my lunch there.  I have hiked about 8 miles so far, 12 or so more miles to go to camp tonight.
I would hike along the ridge line and follow the topography up and down, noting the different trees and plants, stopping to take some photos of wildflowers along the way with my phone.  I would have had put my phone in airplane mode and into a waterproof case as I got out of the car, and haven't looked at it for Facebook/Mail/Texts since.  There is no cell service here, so I switch it back to airplane mode, return it to the case and pack pocket.
I stop at another overlook and check my map for progress.  I would have a couple of miles to go for a lunch stop and the trail is about to get steep with all the contour lines running together.  I snack again and head out.
The climb would be enjoyable with such a light backpack, I really don't even notice it is there.  My trail runner shoes grip the earth.  I would be wearing nylon pants, a wicking T-shirt, a long sleeve nylon fishing shirt, and a wide-brimmed hat.  I typically carry one hiking pole which is handy for setting up my tent at night and moving brush aside and poking around in the places I sit to make sure I can see everything there.  I finally make it to the top and there, just right of the overlook would be a trail shelter with a picnic table.  I like picnic tables outdoors, and along hiking trails with views.  And if there is something I would do for all hikers, it would be to build more picnic tables!
It would be about 1 PM now and I'm hungry.  I set my pack on the table, pull out my food bag and open my Zip Lock sandwich container for my PB&J.  I keep all my food inside a vapor proof bag, and that inside a small zipper bag in my backpack.  I also keep a gallon zip-lock bag for trash there.  I can hang the bag when in bear territory and the vapor bag makes it waterproof and masks the odors very well.  It is peaceful here with birds singing and a light wind blowing, the sun is high and the clouds are few.  I enjoy an apple and some trail mix also, and finish my water bottle.  A good rest is what I need, so I sit back and watch the sky for 20 minutes.  Checking the map shows this next water source will be my last one before camping tonight.  I repack my pack and head on down the trail, finding a large stream this time, where I stop and filter my empty water bottle, two Platypus soft bottles and fill the filter bag with stream water (will filter later).  My pack now weighs a total of 20 pounds with the additional water, minus lunch.
I would have 7 more miles to go before I sleep, more or less.  After crossing the stream using my hiking pole, the time along the trail passes quickly and I stop twice more for quick photo ops and snack on trail mix.
Around 4:45 PM I would stop for dinner at a rock outcropping where I can cook my freezer bag dinner.  I setup my Esbit stove with a full fuel tab, fill my titanium pot with 16 ounces of water, light the stove and put the lidded pot right on it (saves fuel).  My stove has home-made wind screens and a protector for the base to prevent rock burns.  I have a rolling boil in 7 minutes, and pour 8 ounces of hot water in the cozy-wrapped, quart-size freezer bag over the noodles and dried veggies.  I put the water back on the stove and close the cozy.  Then I make my tea by pouring the remaining 8 ounces of hot water into my cup over the tea bag and I put the lid on that too to keep it warm.  I would be cooking with a package of grocery store mac & cheese, previously split into 2 servings.  I have gathered my other dinner items like a small can of chicken, the cheese mix and my Cliff Bar desert.  I check my watch and at 15 minutes, I drain off the freezer bag water away from the trail, and add the cheese and chicken.  After much stirring and mixing, I put it back in the cozy for a few minutes and finish making my tea.  Again I am enjoying the fine weather and cool breezes.  I put my raincoat on to keep warm and eat my dinner, thoroughly enjoying the carbohydrate load.  I clean up afterwards and after a nice break, I brush my teeth.
I packed up, attaching my raincoat to the outside of my pack (because I'll need it again) and hit the trail as the sun sinks lower.  The shadows are now long and the sky colors are quite nice.  As I'm walking around a turn in the trail I come across 2 deer, one older with antlers, the other one a yearling with none.  They are eating the grass alongside the trail about 20 yards away.  I freeze in my tracks and don't disturb them.  Slowly stepping back, I silently watch as they eat.  In a few moments they move on and disappear into the heavy forest on the right.  If I had stopped hiking to camp at dinner time, I would have missed this wildlife opportunity.
I would hike for another 2 hours and as the sun is setting, I find a spot just off the trail and along the ridge with wind protection and a flat area in trees.  There are no low spots here where water would flow in a storm and the small trees around me are all green with no dead branches to fall.  I take my tent from the outside pocket of my pack, unroll it and take out the Tyvek ground cloth.  I would lay it on the ground, laying on top of it myself to position it where there are no bumps, roots or holes under where I will sleep.  I make sure my feet are pointed into the wind, my body is level and I would pitch my tarptent there in about 2 minutes.  I set it high (loosen the stake lines) so I'll get good breezes through it.  If it threatened rain, I would pitch the tent low (tighten the stake lines) to the ground to keep dry.  Tarptents are quite useful in areas like the south, which have a lot of bugs.  It will also do a good job keeping you safe from critters and dry in storms.
I would then climb into the tent with my pack, close the door, rinse off with a couple baby wipes and check for ticks (none!), then get dressed for the night.  Planning ahead told me it should be in the lower 50's tonight, so I dress with my sleeping socks and T-shirt for tomorrow and add lightweight long underwear and a hat.  It is already cooling off and the sun has sunk below the trees, painting the sky beautiful shades of reds, yellows and oranges.  I open the door and enjoy the view from inside the tent, sitting up and watching the stars come out.  I'm not watching for long, as I fall asleep quickly.
Morning wakes me early with the sounds of birds chirping and splotches of sunlight moving about the roof of my tent.  The sound of the wind was in the trees.  I get up, remove my long underwear but keep my hat on, and get dressed for the day.  I load my pack and climb out of the tent to a cool, clear morning with temperatures in the lower 60's.  There was no back or leg pain from carrying my ULBackpack yesterday.  I put on my raincoat for warmth and pack my tent, shaking the dew from it.  I double-checked the ground and recounted my tent stakes to make sure I left no trace.  When I looked back, I could not tell I slept there.  Nice!
I would start walking back the way I came last night, stopping in an hour to eat breakfast and make coffee at a place with a log to sit on beside the trail.  My simple breakfast is a couple of energy bars and a banana followed by a nice cup of hot coffee.  For heating a single cup of water, I would use only one half of an Esbit tab.  I stowed it all away after cleanup and started walking again.  Since I had used most of my extra water, I had a significantly lighter pack again.
I stopped to refill both water bottles at yesterday's second water stop, and refilled them again at the first water stop.  The hike back was all downhill and very pleasant!  I would have spent two fine days on the trail without meeting another soul.
I would reach my car around 3:30 PM.  I would drank from the water I had left in my car for this purpose, put my pack in the back and drove to town to find dinner while finishing my trail mix.
When I would get home, I pull out the tent to fully dry before stowing it away.  I fluff my sleeping quilt and put it in the loose cotton storage bag.  I wash all my clothing and cook gear.  I take stock of my trail food stores and make a grocery list for the next trip.  When everything has dried fully, I fold it and stow it away, ready to pack for the next trip.  I would note anything that I needed to change before the next trip.  Also I would blog about this trip, including my photos.
I won't review my made-up ULBackpack trip, I'll leave that to your thoughts.  Next week we will cover some additional trail items.

Friday, May 30, 2014

Summer is here, let's ULBackpack!

Me (reflection) Backpacking at Green Swamp last year
What I want to talk about today is Ultralight Backpacking, and what things you need and what you need to know to get out there.
The base weight of my gear is currently 9.5 pounds.  That includes the tent, sleeping pad, quilt, clothing, spares, cook gear, first aid, grooming, empty water bottles and the the pack itself.  That is everything I carry EXCEPT food, fuel & water.  I pack about 1.5 pounds per person per day (ppppd) for food, plan for 4 ounces (3 Esbit tabs + 1 spare) of fuel used per day and typically carry 2 liters of water at a time, unless the route requires I carry more between refills (water weighs 2.2 pounds per liter).
Let's start with a backpack.  For up to 3 days, a 35 liter/2130 cubic inch backpack is more than enough space for carrying your ultralight gear.  Some UL Backpackers can hike many more days with this pack.  Aim for a pack that weighs about one pound.  Expect a total loaded pack to weigh under 20-25 pounds including food, fuel & 2 liters of water.  Be sure your backpack can carry the weight before you overload it.  My pack is the Gossamer Gear Kumo and it is very comfortable for all-day long backpacking.  The GoLite Jam is also a very good choice in both the 35 & 50 liter sizes.
Gossamer Gear Kumo - 35 Liters, 1 lb.
For much longer hikes and areas where bear-proof canisters are required, a 50 liter/3050 cubic inch backpack is plenty of space with room to handle resupply stops and 5-7 days of food.  This should weigh about 2 pounds.  You may carry up to 35-40 pounds of gear in your pack for a few days including food, fuel & 2 liters of water.  This would be the right size pack for a through-hiker on the Appalachian Trail.  I like the REI backpacks like the Flash 45 shown below, but there are several other backpack manufacturers you should look at before deciding.  Just remember to keep the weight of a 50 liter bag to as near 2 pounds as possible.

REI Flash 45 - Lg 50 Liters, 2 lbs 3 oz.
Do carry enough clothing to keep warm at night like a polar plus jacket or sweater, long underwear, and a hat.  Remember the temperature drops 3.5 degrees for each 1000 feet you gain in elevation.  So if your trail will climb to the camp site at 3500 feet, and if it is forecast to be 40 degrees tonight down here at sea level, your temperature would be closer to 28 degrees at camp, cold enough to freeze your water bottles (or 3.5 degrees x 3.5 for each 1000 feet).
So with my ThermaRest Alpine 35 degree blanket (quilt) and wearing all my clothing, I would be quite warm and comfortable.  A 20 degree bag would be overkill in the summer and way too hot and sweaty for most nights.
Let's talk about water.  I always plan to carry at least 2 liters of water, unless I am familiar with the water sources along the trail.  For most backpacking trips I have the ability to carry 5 liters at one time using a combination of my two 1 liter Gatorade bottles outside the pack in the side pockets, 2 Platypus 1 liter soft water bottles inside the pack plus 1 liter of unfiltered water in my Sawyer filter bag (filter later).  While that is 11 pounds of water (more than my base weight), it is a full days supply of drinking water for me, counting cooking and cleaning needs.  That would cover me if I had to "dry camp", as long as water was an hour or two down the trail in the morning.  Desert travel may require more, Northeastern US travel may require less.  Just remember it is as important to carry enough water as it is important to not carry too much water.  Research your route and talk to others who have backpacked there recently (last week, this time last year) to get a hikers take on available water flow.  Remember the words from Andrew Skurka, who said that if you reach the next water source and still have water in your pack, you have made a mistake.
To review what you need to know:

  • Your base weight is the total weight of everything in your pack EXCLUDING food, fuel & water.
  • Plan to carry at least 1.5 pounds (ppppd) food per person per day, maybe more.
  • 1-3 night backpack size 35 liters and weighs 1 pound.
  • 5 day+, bear canister capable, through-hike backpack size 50 liters and weighs 2 pounds.
  • Temperature drops 3.5 degrees each 1000 feet of elevation gain.  Carry adequate clothing and plan to sleep in everything you have when it is cold.
  • Water weighs 2.2 pounds per liter.
  • If you don't already know, learn how much water you need to drink per day, include cooking & cleaning.
  • Have the capability to carry one day's supply of water, talk to previous hikers and study the maps and make your best guess at the next water source.  Try not to overload yourself if it is unnecessary.

Next week, we'll cover more about what to expect when backpacking.


Friday, May 23, 2014

Restoring Myself

Friday's Sunset
The weather outside is great for Florida in May, the sun is out with few clouds, the humidity is low and the temperatures were in the mid-60's this morning.  So why am I inside, typing on the computer?  I am restoring myself.
Somehow, I cut my toe and it hurts to walk on it.  Since walking is what I do, I decided to sit back and let it heal, and not make it worse by hiking on it today.
I did some household chores and took my wife out for a short day trip and we enjoyed fish tacos outdoors. Yes, I walked a little, but I really enjoyed myself.  By slowing down and not pushing to check off everything on my to do list in the scant daylight left to me, I can enjoy some peace, and even be surprised at what I do find.
A nice break at a trail head.
On Saturday I rode my bicycle along the Seminole-Wekiva trail for 16 miles and spent the rest of the day watching movies.  Nice and relaxing!
Hopefully, I'll be able to walk better next week, maybe even ride my bicycle again, take some more photos and just enjoy being outdoors.
Next weekend, I will be back outdoors again, shooting video and having a blast!  And feel renewed because I spent some time restoring myself.  Isn't life grand?
A mom Raccoon with 2 babies along the trail

Friday, May 16, 2014

So I hiked along the Econlockhatchee River in the Little Big Econ State Forest last week.  The forest is north east of Orlando and this trail follows in an east-west direction from the Barr Street trailhead to Snowhill Road.  Both the Little and Big Econlockhatchee Rivers are in this forest, and the trail passes along both of them.  I hiked a little more than three quarters of the way out and back.  As I mentioned in a previous post, I shot video along the trail using my Ultralight Filmmaking equipment and iPhone 5C.
The weather was hot, nearly 96 degrees.  The sky was mostly clear and there was a light breeze, which made the hike bearable.
Even though it was hot, I had an excellent time!  I was so busy setting up shots and making camera moves that the time just flew by, and I actually ran out of time to finish the hike.  Also I ran my camera battery down to 17%, using the FILMIC PRO App, so I had to shut my phone off on the return trip to conserve power for an emergency phone call in case I needed to make one.  The next time I'll bring my Solio Bolt backup battery.
And the trail was excellent!  Traffic noise died down pretty quickly and I didn't hear anything mechanical except a couple boat motors in the distance and an occasional airplane overhead.  A lone trail runner guy passed me twice, but that was it for people outdoors.  I really enjoyed walking by the river.  The trail was well-marked, the bridges were in good shape (can be an issue in super-humid Florida), and there was lots of wildlife.  I did come across a large turtle, found some cardinals flitting in a bush, followed squirrels along tree branches and heard lots of splashes in the water and bird whistles in the air.  
I got into the rhythm of setting up, practicing a move, getting the shot and moving on.  I did miss not having wide angle, macro or telephoto lenses for some shots, but I will get them later.  I missed having full manual control over the camera like I used to use, but the video came out fine.  I didn't use the lavaliere microphone yet, but that will come soon.
When I returned home and recharged the batteries, I loaded the clips into the iPhone's camera roll, opened Adobe VideoBite and began editing.  After a few minutes I was intuitively using the App, trimming and dragging clips around.  It was cool to edit within the phone.  It was very, very easy and it is very, very limited.  But I do like how it came out.  The finished product is below, and it gives you a feeling of what it is like to hike this trail.  I hope you enjoy it.
On my Facebook page Lite Packer Lifestyle, there is a shorter version of this video.  Facebook limits you to two minutes for your video, You Tube does not.  Plan on seeing more videos from me in the future.
Many years ago in a previous life I was a TV news photographer.  I really liked what I did, I was respected by my peers and I was welcomed to work on the other side of the crime scene tape daily.  Though I am many years out of practice, I felt a little bit of that goodness today, and it was wonderful!

Friday, May 9, 2014

Ultralight Filmmaking Hike

Map of the Econlockhatchee River
Since last weekends weather was exceptionally wet,this will be my first weekend to shoot video and stills outdoors with my iPhone.  I'm really looking forward to getting out, even though the temperatures will be in the mid to upper 80's.  I may go toward the Econlockhatchee River which is just a few miles from my home, but I'll make that decision in the morning.
My plan is to hike and document flowers, foliage and wildlife along the way in both video and still photos.  Shooting along water would also be nice.  I won't hike very far, the idea is to spend most of the time capturing the outdoors digitally.
When I return home, I'll begin to edit these video clips and photos into a few short videos on my iPhone (if they are any good) to post on Facebook and this blog.  I'll write a brief word or two on editing with Adobe Videobite once I use it.  It is a free app I downloaded.
Tripod on backpack ready to go
Here is a photo of the new Tiffen Fusion tripod attached to my day pack for a day shooting video outdoors with my iPhone 5c.  It weighs a little over 3 pounds 7 ounces and works very well to shoot smooth pans and tilts.  Mounting the iPhone to hold it steady is critical to getting good videos and photos, and is just as critical as having good lighting.   Since I'm shooting outdoors there should be no issue with the latter.
Tripod mount at 8.8 grams
The iPhone mount I purchased is also lightweight and so far under test has held my camera very securely.
My years of media experience will have me record voice-over audio on site, on camera.  I'll be using my new Audio Technica lavalier microphone for all voiced shots.  Wild and natural sound will be captured from the built-in camera microphone unless there are noise or wind issues.
I may look a bit weird with headphones and a microphone clipped on with the tripod suspended from my pack and my iPhone in a case on my waist, but I have looked much weirder and heavier before when working in the media industry.  This time I will be shooting video for myself.


Friday, May 2, 2014

Ultralight Filmmaking

iPhone 5C

I have been assembling camera pieces over the past few weeks to record videos and shoot photography outdoors with my new iPhone 5C.
My older Cannon Vixia HF R20 video camera weighs over 10 ounces, so the i-Phone is currently the best bet at 3.95 ounces for carrying a lightweight camera that also shoots HD video.  It is also a better camera choice for stills since it has an 8 megapixel camera (Canon = 3MP).  There is also the fact I can edit and post videos using the cell phone, something else I cannot do with only the Canon camera.  Plus GPS, maps and all the other fun apps that can make life seem a little easier.
Some of the apps I will be using include Filmic Pro for shooting video and Adobe VideoBite for video editing on the iPhone.  For photography I have been looking into the Camera+ app and a few others.  I will download other photographic and film-effect apps over time.
If you have any question about using an iPhone for making a professional quality video,  watch this film onlineYou will see what I mean.
Tiffen Fusion fluid head tripod

To improve the photo and video quality I have also purchased a fluid-head tripod (think smooth moves), a tripod mount with a unipod handle for light hand-held work, and an Audio Technica lavalier microphone for recording quality audio tracks and interviews.
The weights:
Tripod - Tiffen Fusion, 3 Pounds, 7 ounces.   I could not find a lighter weight fluid head tripod.  Most weigh 7 pounds or more.
Mount - First2Savv tripod mount.  No weight given, but expected to be around 12 ounces with the unipod handle.
Microphone - Audio Technica ATR-3350 lavalier mic, .02 ounce.  Plus a couple spare button-size batteries.
There is also an audio converter cable with both mic and headphone jacks at about .03 ounces.
This is a good start and I'll be looking to get Olloclip lenses and will be testing different mounts like SteadyCam as I go.
For hiking and backpacking, the tripod hooks onto my daypack or backpack easily, and the iPhone  lives in its belt case.  The microphone gear stays in a small waist pack or the backpack belt pockets. 
It is all very lightweight, and some parts are Ultralight.  It all gives me the power to create quality hiking, backpacking and travel videos & photos without having a lot of stuff to carry.  I believe the total rig will only add about 4 pounds to my current 9 pound base weight when backpacking.  That's far less than my 11 pound Nikon and lenses.
BTW - I call it "FILM MAKING" because I am old school.  I started with a 35 mm camera at 10 years old, studied in the film program in college and have worked in various media and television industries for about 40 years.  My Filmmaking life is much like Ultralight backpacking, where the most important stuff you use is in your head.
Watch for upcoming short videos on this blog, on the Lite Packer Lifestyle Facebook page and on a new You Tube Channel coming soon!

Friday, April 25, 2014

Summer Ultralight Day Hiking

2014 REI Flash 18
Here are some quick ideas to lighten your load for summer day hikes.
Day pack.  You can find an Ultralight and load-worthy day pack that carrys about 20 liters and weighs only 10-12 ounces.  I use an REI Flash 18, but I also like the Flash 22 since I can carry water bottles in the side pockets and the first aid kit in the top pocket.  Both packs swallow everything I can think of to carry, including my 10 essentials, lunch and a stove & cup for on-trail java.  There are many other Ultralight backpacks out there, just remember the size of about 20 liters and 10-12 ounces in weight.  Don't forget to weigh everything!
For water bottles, I alternate between a 2 liter Platypus water bladder, and 2 lightweight Gatorade 32 ounce/1 liter bottles.  While I prefer the straight-sided 32 ounce Nalgene bottles because they fit better going in and out of backpack pockets, they weigh too much for me at 6.2 ounces each for the Lexan bottles and 3.5 ounces each for the poloyethylene Nalgene bottles.  32 ounce Gatorade costs about a buck a bottle new, and when emptied the bottles weigh 1.8 ounces/52 grams each.  Be sure to tell your significant other not to toss them with the trash!
I also wear trail running shoes, the Montrail Mountain Masochist, which are very lightweight at one pound each, and are very comfortable.  They also grip anything you walk on.
My clothes are always nylon and polyester, usually long pants and a long sleeve shirt over a T-shirt, and a hat which protect me from the sun and wind.  They even help keep the mosquitoes at bay.
The 10 essentials in my pack include:
1. First aid kit.
2. Headlamp.
3. 2 liters water, Sawyer water filter.
4. Shelter including thick & thin rescue blankets & Marmot Precip rain jacket.
5. Fire starter (lighter, matches, lint).
6. Compass & trail map.
7. Spares, pocket knife (includes emergency reflector disk).
8. Sun screen & sunglasses, bug spray.
9. Food, Esbit stove/pot/mug/spoon.
10. Warm shirt/sweater/hat/gloves/pack towel.
You can check out REI's updated 10 Essentials list here.
All of this weighs just under 10 pounds, with 4 pounds of that being water (@ 2 pounds/liter).  It is so light, I don't even notice I am carrying a pack while hiking.  It feels natural and normal, and I always have everything I could possibly need for safety.
Occasionally I will carry an additional liter of water if I am hiking in dry country and I always carry a little extra food, just in case.  Spares include another way to start a fire, extra batteries, spare mini flashlight, water purification, and sewing and maintenance kits (listed HERE).
If I had to spend a night out, I could, though it would be uncomfortable.  I would be warm enough and protected from the wind and rain.  I could fashion a tarp for shelter, cook something to eat & drink, build a fire if needed, wrap up for warmth or signal for help.
This is partly why hiking or walking in the woods is so comfortable for me.  I have learned what I need to know to be safe, and I carry myself lightly on the earth.
The other part is that I just love being outdoors.  I really love it!

Friday, April 18, 2014

Under $350 Ultraight Backpacking Kit

For simple overnight backpacking trips, you can easily put together an Ultralight Backpacking kit that costs around $350 and one that weighs MUCH lighter than the backpacking kit listed recently in Outside magazine
I have been asked several times to put together an Ultralight Backpacking kit that costs XX dollars for so and so.  Here's my attempt at assembling one for around $350, about what any hobby starts at.
First buy or borrow a postal scale that weighs pounds, ounces, and grams so you can know your equipment's actual weight.  Everything but the food listed here is available online.
Lets start first with the Big Three, the pack, tent and sleeping bag.
Pack - Go Lite Jam 35 costs $99.99, weighs 1 lb, 11 oz @ Go Lite.com.  35 liters is the correct size for overnight backpacking trips IF you carry lightweight equipment.  It also comes in blue or green.  Your Go Lite 35 pack is an excellent choice, and it will last and last.  The idea behind the 35 liter size is to just carry less.  You won't need to carry more than that on 1-2 night trips.

Tent - Eureka Solitare 1 person tent costs $68.94, weighs 2 lb, 9 oz @ Amazon.com.  You may find this for even less if you search online.  Use the included poles and stakes.

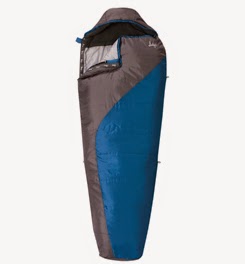
Bag - Slumberjack Lone Pine 40 degree sleeping bag costs $59.98, weighs 2 lb, 4oz @ Campmor.com. More than warm enough for most summer camping, add a sleeping bag liner for more warmth.

The Second Big Three includes sleeping pad, cook stove & gear, and water filtration.
Pad - Thermarest Trail Scout inflatable pad (full size) costs $39.98, weighs 1 lb, 11 oz @ Campmor.com.  You need protection from the ground's cold and some padding to sleep comfortably.

Cook gear - Esbit stove/cook set costs $22.95, weighs only 7 oz @ Amazon.com.  Any plastic spoon and lightweight cup will do for the rest of your cook kit.

Water filtration - Sawyer Mini Filter costs $24.95, weighs only 2oz @ REI.com.  This is all the water filter you will ever need and your water won't taste like chemicals.  Use chemicals as a backup.

This gets you to $307, more or less and weighs about 8 pounds and includes the same type of items as were listed in the article.  That 8 pounds would also be called your base weight, before food, fuel & water are weighed.
Extra items that not mentioned in the article, but are things you would still need...
Fuel - Esbit Tabs 12 pack is $7.99 ( need 2-3 for overnight trip @ 1oz each)  @ Amazon.com.  Add this to the food, water & fuel weight.

First Aid kit - Adventure Medical Kit .5 is $16.95, weighs 10 oz @ REI.com.  Learn to use everything inside the kit.  And it is waterproof!

Rain -  Outdoor Products Multi-purpose Poncho is $30, weighs 12 oz @ REI.com.  Works fine unless it is windy, and it gives you something to sit on during breaks.

Water bottles - Gatorade 32 oz, empty & rinse 2 of these, and once you drink the Gatorade, they are free. Thanks for keeping them out of the landfill.  I keep a couple of spare lids at home in case I lose a lid.

Those add up to $55 and another 2 pounds for a total of about $359 and a total of 10 pounds base weight.
And I have nothing against Outside magazine, I read them often.  I used to purchase those same heavily built packs and shred my feet with those same hard leather boots, but no more.  Instead of the 40+ pound non-ultralight gear mentioned in their article, you can cut that weight in half for about the same price.  Food, fuel & water will weigh around 6-8 pounds more.  Make sure you bring a lighter, matches, flashlight, trash bags (water-proofing), a sweater and soap.  This brings your base weight to about 10 pounds.
Total weight for the Ultralight pack with food, fuel, water & all your stuff is under 20 lbs.  Again, that is less than HALF the weight the magazine article is suggesting that you carry.  Your new pack will carry easily on your back, your knees won't hurt and your feet will be light on the trail.  You will move quicker and not be as tired at the end of the day.  You will be happier, trust me.
A little more searching online may lead you to even better deals.  If you want to go on a backpacking trip in the shoulder seasons (spring/fall), add a sleeping bag liner, long underwear, and polar fleece outerwear, hat & gloves to keep warm.

Beyond the $350 amount, I suggest you invest in a pair of trail running shoes like the Montrail Mountain Masochist II  at $71.51, 2 lb, at  Amazon.  They work great for me, grip the ground awesomely, and at a pound each are very light weight.  You can also wear them for other things than backpacking.  Boots are such overkill.  They are heavy and they shred your feet.  With such a light load on your back (it weighs like most day packs), boots are no longer required.
For food, plan on keeping it simple: mac & cheese & a very small can of chicken that can be freezer bag cooked, an apple, fig bars, breakfast bars, PB&J, trail mix, coffee/tea, etc.  Or eat before you leave the trail head and don't cook dinner the first night out.  Once you get into this, you can create all kinds of wonderful and tasty meals at home to enjoy on the trail.
And wear no cotton clothing - what you already own that is synthetic material will work great, you don't really need hiking-specific clothing.  I wear a synthetic sports t-shirt, thin socks, compression underwear, with nylon pants, and a long sleeve fishing shirt.  With the pants & shirt both being nylon, they dry quickly and block some wind and sun.  And wear a hat.  In Florida I wear a lightweight hat with a wide brim with vents all around.
A hiking stick is always a good idea, and a lightweight wooden one is fine - you can always get collapsible hiking poles later if you still need them.
The other things you need are some basic outdoor skills and a positive mindset.  Basic map and compass skills, camping skills, knowing your knots and a knowledge of first aid (all those things that you learned in Boy Scouts).  These items and more are covered in the Free Ultralight Backpacking E-Book available at Lite Packer Lifestyle on Facebook.  Or search for Ultralight Backpacking how to books on Amazon.  Remember, knowledge weighs nothing!
In between trips, read lots of ultralight blogs for cool DIY weight-saving ideas.  Shop online sales for shoulder season polar fleece and down clothing.  Convince your friends to go camping with you.  Go backpacking 1-2 weekends a month.  Join the Florida Trail, the Sierra Club or any local backpacking group that actually gets out there.  Challenge yourself at least once a year on a multiple day hiking trail far away from home, a kayak or canoe river camping trip or even on a loaded bicycle tour, all using Ultralight weight camping gear.
Dream of backpacking the AT and the PCT.  Pack light, go far, very far.