Friday, June 21, 2013

Preventing Blisters

Back in the winter hiking season, during January 2013, Sandra Friend invited me to write a blog for use on her website, Florida Hikes! I did, and this is it.  I'm printing it here for those readers who have asked about foot care.  Thanks Sandra!

Blisters can be your worst nightmare on the trail.  They are so much easier to prevent than to treat.  I know, because I have been plagued with them my whole life, until a couple years ago.  All of my boots since I went to Philmont as a Boy Scout in 1971 have blistered me.  Even at Philmont I had one blister start as a hot spot, but I caught it in time, put on a band aid and finished the trail with no other problems.  That was long before duct tape was available everywhere.  I had worn those boots almost daily since I bought them, and they were well broken in before the trip.  After Philmont I had blisters every time I hiked.  I tried different sock combinations, different boots and every bandage I could find in the foot section of the pharmacy, but still had blistered, painful feet, with lost and blackened toenails.  I even looked into having custom boots made for me once but the very high cost of admission drove me away.
Disgusted with hiking boots, I started day hiking in my trail running shoes which I had purchased because they had good heel support and were comfortable.  After quite a few different trips over quite a few years, I realized it had been a very long time since I had a blister on my feet.
When we moved back to Florida from Colorado, some of the scout troop leaders here made it clear adults and scouts were to wear boots when hiking.  Well, the blisters came right back.
Body Glide comes in multiple sizes
About that time I read a blog about hiking with "happy feet" by using Body Glide, or Hydropel as it was called then.  It is a petroleum based jelly ointment that you rub on to apply, like a deodorant.  I tried it with the same scouting boots and socks and guess what?  No blisters!  I also used it on an all-day Ocala National Forest day hike in 2011 and it worked fine with my worn-out, full of holes trail running shoes.  Body Glide came from the ultra-marathon running industry, where it has been used for several years by serious distance runners.  Body Glide lubricates your feet, so almost nothing will wear a hole in you.  It eliminates friction.  It makes your feet just too slick to rub raw against anything in your boots or shoes.  The story also said it prevents "swamp foot" from your feet being soaked in water daily.
I later read that when backpacking, clean and lube your feet at night after you stop for the day, then re-lube them in the morning with Body Glide before you start walking again.  If you do get a hot spot, stop right then and re-lube the affected area.  That will usually prevent a blister.  Body Glide will also work for chafing pretty much anywhere on your body like from pack straps, or a too-tight pack waist belt and is used by bicyclists to relieve saddle sores.
In case you wait too long and your hot spot becomes a blister, wash the treated area with soap and water to remove the Body Glide slickness to apply tape to the area.  Typically Leukotape works fine, but so does duct tape with a spot of ointment (from your chap stick).  It has been a long time since I had to do that.
When hiking the Florida Trail, you can spend many days with wet feet (and more) walking in water ankle to knee deep, even to waist-deep sometimes.  The trail actually begins in water at the new southern trailhead at Big Cypress National Preserve at the Oasis Visitor Center along the Tamiami Trail between Naples and Miami.
Here's a link to REI where they have Body Glide in several sizes.  You can sometimes find it locally at Sports Authority, Walmart, Rite-Aid, CVS, or Walgreens.  The .045 ounce size is fine for short backpacking trips, with total weight of 1.2 ounces or 34 grams.  Some ultralight backpackers transfer the ointment to a lighter container to further reduce weight.
Central Florida has it's own issues with water on the hiking trails, especially after a heavy rain.  I can't think of any other product out there that can better prevent blisters than Body Glide with the twice-daily application.  If it works for me and my feet, then it should work for you.

Friday, June 7, 2013

Canaveral National Seashore

View from the top of Turtle Mound.
My friend Walt and I went for a late spring hike at Canaveral National Seashore, just south of New Smyrna Beach.  I have been to the Merritt Island part of the park several times before on fishing trips and canoeing the Mosquito Lagoon, but had never made it to the Canaveral Seashore.  The Seashore is 24 miles of undeveloped shoreline on the Atlantic coast along a barrier island, running from seven miles south of New Smyrna Beach down to Cocoa Beach.  It also contains the government sites of the John F.Kennedy Space Center and the Cape Canaveral Air Force Station.  This land was set aside in the late 1950's to provide room around the space center and military base.  In 1963 the US Fish and Wildlife Service managed Merritt Island Refuge with the National Park Service operating the National Seashore since 1975.  Car and motorcycle daily entrance fees are $5, bicycles enter for $1.
The shore, few people and absolutely no buildings.
The shoreline is made up of a brown, course sand (unlike Daytona Beach's white fine sand) and the views stretch for miles with no buildings.  No condos.  No hotels.  No homes.  No businesses.  No cell towers.  No nothing.  When you get onto the beach and walk, it feels like what was intended by nature, a natural, relaxing and peaceful walk in the sand.  Personally, I would prefer all of the nation's shorelines to be just like this one, with a road and parking spaces every few miles, and no beach access allowed over the dunes anywhere except where deck access has been built for you, and with no permanent structures built on the variable land of barrier islands.
The Canaveral Seashore can be a narrow world between the waters.  There are places you could throw a rock-sized shell from the Atlantic Ocean into the Mosquito Lagoon.  Some areas of the barrier island are much wider across, like at Turtle Mound and around the old town of Eldora.  We knew the weather was going to get very hot soon and the bugs would be awful, and we wanted to visit the park before summer heat and humidity set in.
Walt on the easy walk up and down boardwalk of Turtle Mound.
Mosquito Lagoon.
Turtle Mound is a shell midden, or mound, now about 50 feet tall.  In the past it was estimated to reach another 25 feet in elevation.  It was an east coast navigation feature marked on most of the early Spanish, French and British sailing maps of the time and can be seen miles out to sea.  This mound is built of oyster shells mostly, and fish bones and it must have taken multiple generations of native American workers to process and pile these shells to this height.  When you look at how tightly the shells have been pressed together, you wonder at how many shells there can be in a mound this tall.  The mound walls become so steep near the top, the park service has built a trestle-like walkway to easily climb to the top of the mound at a gentle grade, and then when on the top to be able to look both in all directions without the users causing erosion or disrupting the mound.  The breeze on top was excellent.  The trees have stunted grown here are similar to the krumholtz wind-damaged trees in the Rocky Mountains.  The salt content in the air continually kills new growth, keeping the trees small.  It is believed the Timucuan Indians settled this region and built these mounds from 800 to 1400 AD.  The views are awesome!
The scenic view in the trees on the way down from Turtle Mound.
The lagoon's edge at Turtle Mound.
At the base of the mound, a school bus load of elementary children from Volusia County were learning the fine details of using a siene net and about how the Timucuan Indians lived, hunted and worked the land and sea.  Taught by knowledgeable National Park Volunteers, I could have sat and listened for hours.
The Welcome Center is where we started our morning, viewing a video about the park.  If you call with a question or to reserve a campsite, this is where the phone calls are answered.  The rangers here were excited about the turtle laying season about to begin and were discussing all the turtle programs they have underway and all the people they expect to visit the park.  Most of the Federally endangered Leatherback turtles come back here from the sea to where they were born to lay their eggs in the sand.  When they hatch at night, baby turtles follow the light reflected from the sea to return to the ocean.
Volusia County students in learning mode.
From Turtle Mound, we drove south to the end of the road and walked down to the beach.  It was mostly surf fishing-people here, some with carts loaded with poles and gear and we watched someone reel in a blue fish.  We noticed the crowds were mostly staying close to the parking areas.  The empty areas between parking lots seemed to go on forever, with nobody in them.  I decided that this will be one of my next bicycle rides, along the surf on the deserted beach.  We also walked over to the lagoon side where there was a boat launching ramp at waters edge.  From here you could easily see the how high the dune was above us, and imagine how easily a huge wave during a storm could crash over this area.  No Atlantic hurricanes are known to have attacked the area from Cocoa Beach north to St. Augustine in our time.

Looking north along the empty beach.


And looking south.
Castle Windy is the second shell midden we went to see.  Parking at the beach lot, we followed the half mile path through the woods to the lagoon side.  There was a pamphlet in a box at the start, numbered to identify plants and trees marked with posts along the path.  Here was where we met the full force of the name sake of Mosquito Lagoon.  The mosquitos were so thick around our heads we couldn't breath without inhaling a few.  My long sleeves and pants kept the bugs off my body.  Walt's back was black, covered with mosquitos and they wouldn't leave us alone until we re-applied my eucalyptus bug spray.  We finished the walk and stood along the lagoon shore in the wind where there were few bugs, before returning to the car.

Along the mosquito-infested trail to Castle Windy.

Castle Windy shell midden.
We next visited the community of Eldora after watching a turtle maneuver in the parking area.  This was once a farming community where Indian River citrus was first developed and grown in Florida, a popular brand of fruit you can still buy, though for years it has been grown elsewhere in the state.  They also grew indigo (a plant-based material for coloring fabric blue), raised honey bees and grew vegetables.  This is where saw palmetto plant berries were harvested for making pharmaceuticals (and are still used in treatment of prostate issues).  Palmetto honey is a light and very tasty honey that was a favorite up north where the crops were shipped.  Two tears of killing frost in the 1890's decimated the citrus industry and the town never recovered.  The last remaining house in Eldora was restored by the Friends of Canaveral in 1999 as a museum and it has a video you can watch about the early town, riverboat traffic and the people who pioneered the area.  The native plant life around the house was beautiful.
A Florida variety of coral honeysuckle.
Fishing is another major highlight in the park.  In Florida you can get a no-fee license to fish from the sea shore or from a dock.  You can then fish in the Mosquito Lagoon shoreline, from the dock, in the surf at the beach, and you can fish while wading in the water.  For those who prefer fishing from a kayak or boat, a $17 saltwater fishing license will get you started.  Click here for fishing license details.  We saw several people boat and kayak fishing in the deeper water just off Turtle Mound, on land from the Eldora dock, while wading in the shallow lagoon and surf casting in the Atlantic.
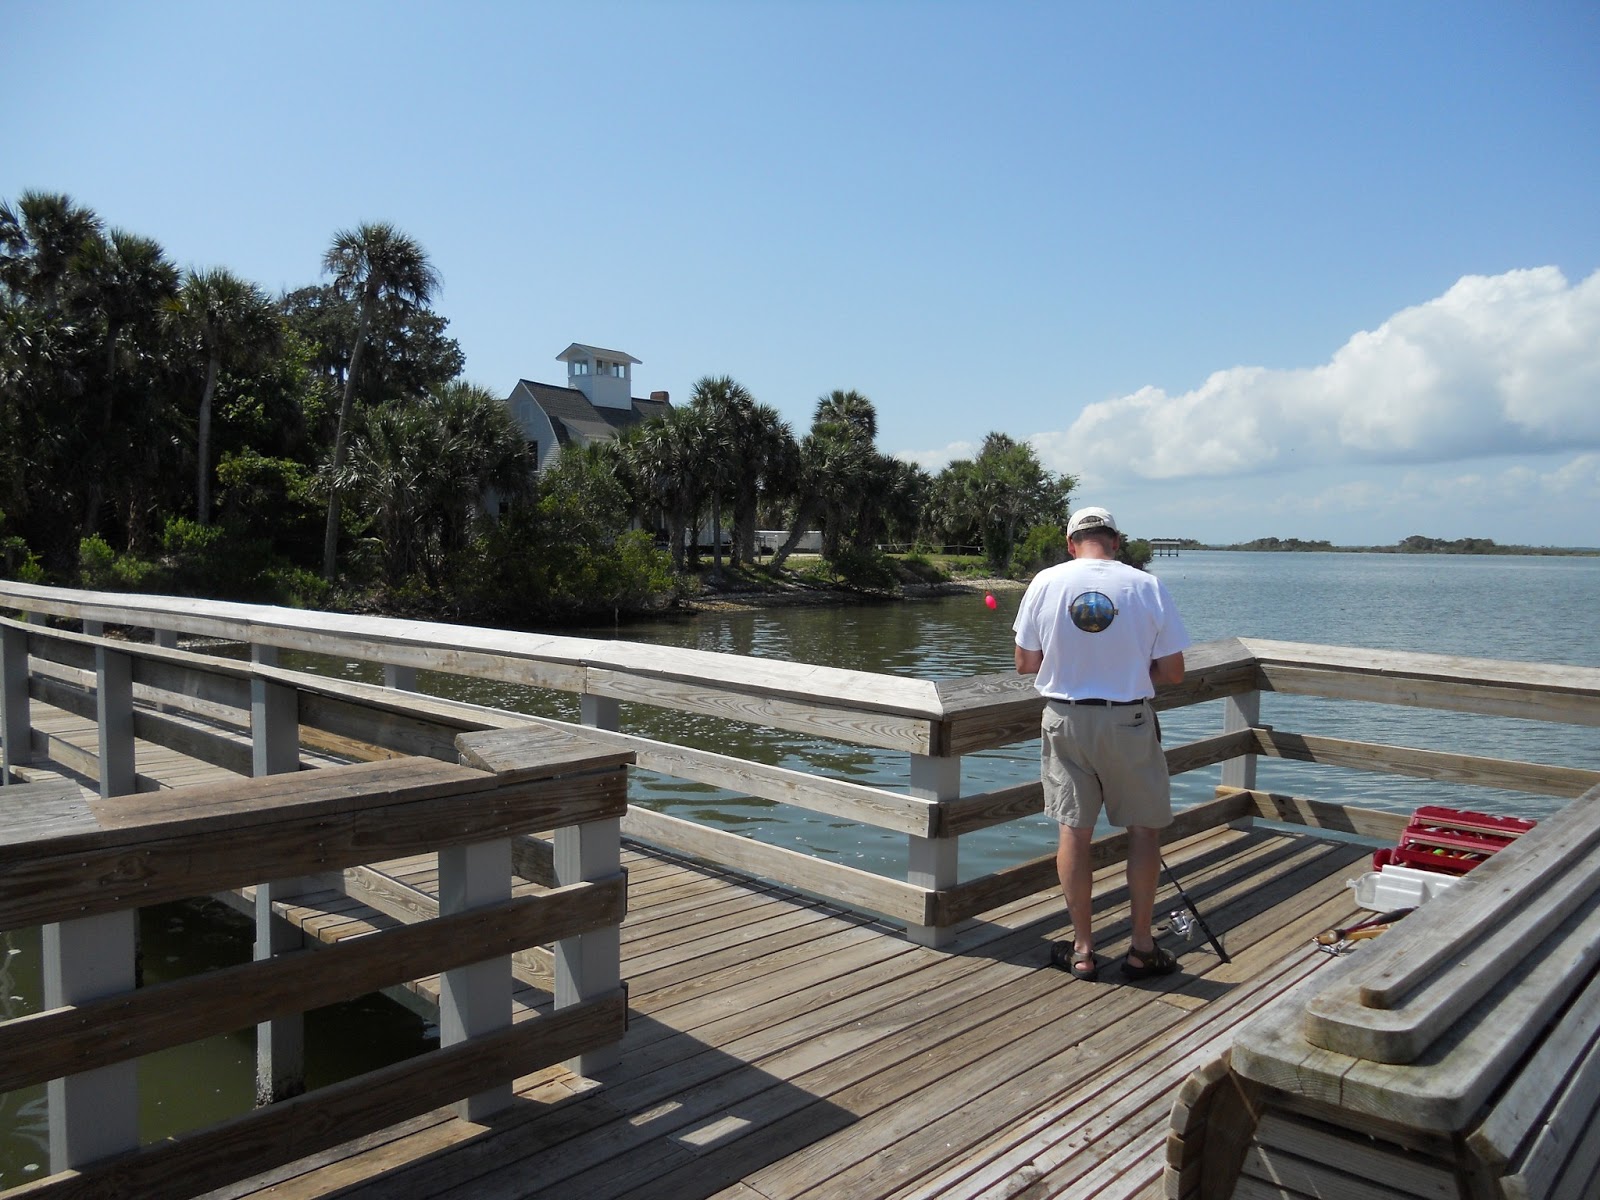
Fishing at the Eldora dock.  The State House is in the background.
Fishing at Turtle Mound in the deeper water.
The endless sea life in both the lagoon and the ocean took our breath away several times during the day.  From Turtle Mound I saw what looked like a whale leaping and crashing in the ocean.  I tried on several occasions to get a photo of the several dolphin splashing in the lagoon.  Mullet jumped from the water many times and from the Eldora dock you could see fish swimming in the shallow water.
Birds are another big draw at the Seashore, with over 300 species recorded here.  There are over 1000 species of plants listed, for many of the plants this is as far north in Florida as they grow.  There are 14 federally endangered or threatened species of wildlife living here including manatees, turtles, southern bald eagles, wood storks, peregrine falcons, eastern indigo snakes and Florida scrub jays.  And in the winter there are the migratory birds from up north.
Resurrection fern in non-resurrected mode, waiting for rain to burst forth with green growth.
A strangler fig tree strangling an oak.
Flowers are everywhere.
There is primitive camping at the park, though I suggest you plan to camp here in the winter months when it will be much cooler at night.  You can register for either of the two Apollo beach area campsites or any of 14 waterfront sites on barrier islands along the Mosquito Lagoon.  You will need your own boat to reach them or you may rent a canoe for sites 1-5 at the park welcome center.  Campsite reservations cost $2. This backcountry camping brochure says campsites will cost $10 to $20, depending on how many people you bring.  My suggestion is that you call the Ranger at 386-428-3384 and ask.  Also check out the kayak and canoe trails in the area like this one in the Mosquito Lagoon at Shipyard Island (nice photos).
It was in the mid-80's the day we went, and the Florida weather was beautiful.  Walt and I finished the fine day with lunch outside the park at a fish camp on the Mosquito Lagoon and enjoyed a quiet drive through the barrier island village of New Smyrna Beach.  It was a great day!
Turtle in parking lot.

Friday, May 31, 2013

My First Year Blogging

May 26 was the day in 2012 that I first published a post called "Starting Out" on litepacker.blogspot.com.  In this first year, I have learned much about blogging and some about hiking, have hiked a lot of local trails and have successfully backpacked as an ultralight backpacker for the first time.
What a year!  My monthly readers are now averaging about 2400, and with the total people looking at my blog over the year equaling 15,602.  I have worldwide readers logging in from Poland, Austria, Germany and the UK too.  Thank you so much!
Now maybe all those page views actually were not people.  I have to assume MOST of those numbers are people, and I'm very thankful for the audience.  It has been very rewarding to see these numbers increase, but I do understand that I will need to increase my current weekly page views by thirty times or more to have what is considered a "successful blog".
I also write a couple other bi-monthly blogs, one about Bicycling over 50 and another about Family Micro-Gardening.  And I read several blogs about backpacking, bicycling and the outdoors, plus just about anything I can get my hands on - I love to read!.
I'm also thankful to bloggers like Phillip Werner at Hiking-Blogs Directory.  Phillip created this site to show ultralight backpacking blog pages and it sets us up on a level playing field.  Please drop by and vote for my site, it will increase my site rankings and move me closer to the top of the list.  Also thanks to Rebecca Garlock and Joe Wolf at the Outdoor Blogger Network for accepting my posts.  Being part of a larger community is great and my readership increased significantly with both sites.
I did recently setup my site for an RSS feed and am working on making it actually function.
Thanks also to the Florida Trail Association Central Florida Chapter and especially to Rachel and Lou for their tireless work and trail maintenance, and for allowing me to post and write about the group on my blog.
Thanks to local outdoors author Sandra Friend with FL Hikes for offering me an opportunity to assist her by transposing her hike recordings.   Sandra then took them and finished the text for publishing.  It was neat being in her "ear" while she walked the trails, learning technically how she documents her work and gets it to print for you to read.  She also published a blog of mine on her web site, which brought me some readers.  I am forever in her debt!
Many thanks to Ben at the Sierra Club Tampa Bay Group for allowing me to join their backpacking trip, and for leading such a successful backpacking trip.  I'm looking forward to joining the Central Florida Sierra Club group over the summer and traveling with Ben and crew on West Florida backpacking trips next fall.
An even bigger thanks to my wife for allowing me more than my fair share of time on the family computer this past year to write these blogs, and for proofreading and offering suggestions to improve my writing.  We've also hiked several of the trails together that you have read about and even more that you haven't.
Just like last year, I will slow down writing my posts during the hot Florida summer heat, picking up again when the weather cools a bit this coming fall.  It is like the seasons are reversed down here, the summer being so very hot that you cannot get out and enjoy the outdoors.  When the temperatures here reach the upper 90's you get burned just getting into your car.  Where up north, it is the winter season when you can't get out because it is too cold.  Winter is typically very mild down here, and that's when I'll be backpacking, bicycling, kayaking, getting out and writing about it.
And the most thanks go to you for reading my blog.  I really appreciate it.  And thank you for a great first year blogging!

Friday, May 24, 2013

REI Flash 18 Water Bladder Holder MYOG

For my REI Flash 18 daypack, the water bladder pocket does not have a holder for a bladder at the top of the pack.  Usually my Platypus 2 litre bladder works just fine, but last week the top somehow folded over, cutting off my water supply before it was empty.  When I opened the pack to see what the problem was I was surprised to find the water bladder had folded over, until I noticed how empty the bag was.  For ultralight day hiking and bicycling I will usually carry a nearly-empty pack, the water being the most important item in the pack.
REI Flash 18 daypack and parts
While shopping recently, there was a clothing hook (for socks?) laying on the floor as trash.  I picked it up and pocketed it, thinking of what I could use it for.  Well, here it is!
Poking the hole
I poked a hole into the center of a seam along the inside pack top using a hammer and a small screwdriver with a sharp point. This seam made it possible to poke a hole through while staying totally inside of the pack.  Then I threaded a small zip tie with the clothing hook through the hole and cut off the excess of the zip tie with wire cutters.  The blue foam is a piece cut from my old sleeping pad, to give the pack support and shape, and to pad my back from whatever I may be carrying.
Attaching the hook with a zip tie
When installing the Platypus, it was easy to loop the hook through the white clamp top of the bladder.  It held the top of the bladder without an issue and was small enough to not be in the way when loading the pack with anything else.  Once the pack is placed on my back, it straightens out the bladder and holds it upright, preventing it from folding over.  And it doesn't weigh anything on my scale.

A simple MYOG, a simple fix, my water problems are solved!

Friday, May 17, 2013

Simple Mac-n-cheese Dinner Review

Kraft Mac-n-Cheese
For my simple and easy camping dinner on the Green Swamp camping trip, I placed a full box of Kraft Macaroni And Cheese and the full flavor packet into a quart-sized regular zip lock bag (was out of freezer bags).  The idea was to make cooking my dinner very simple by just boiling 2 cups of water on my Esbit stove.  To this bag I added 1.5 cups of boiling water and placed the ziplock bag inside my cooking cozy, clipping the top of the cozy closed with a small spring-clip.  After 20 minutes of cozy cooking, the mac-n-cheese noodles were cooked through.  I drained off the excess water and added a drained 3 ounce can of chicken breast.  Once stirred, I enjoyed the whole bag.  My drink was hot tea, made from the other half cup of water I boiled earlier.  Cleanup was washing my spoon and cup and closing my zip lock bag, placing it inside a trash zip lock inside the Ops Sac bag I used to transport my food.  Desert was a chocolate-mint Cliff Bar, yum!
Apparently the simplicity of my meal drew lots of questions from the group.  A few of the Sierra Club members we were camping with seemed impressed that I had just opened a full box of mac-n-cheese and dumped in a can of chicken for a scrumptious, and quite filling dinner.
However, I could have eaten a lot less food that night.  To make a better portioned meal, I would cut the mac-n-cheese noodles in half when packing it and still use one and a half cups of water to heat it in the cozy.  Then I would drain the noodles,  and add the flavoring mix afterwards.  Cutting the flavor packet in half shouldn't be too difficult.  I would also use a quart-sized freezer bag to cook in, because they seem to hold up better to the heat of boiling water.  Adding a quarter cup of dried vegetables to the mac-n-cheese mix would make it a much more nutritious meal, and this could be done before the water is added.  I'll try this out at home.  Once I get the details worked out, I'll publish the recipe.

Friday, May 10, 2013

Granite Gear Air Zip Sack Review

Granite Gear Air Zipsack, xx small to medium L to R.
To carry my food, cooking gear and other "smellable" items on backpacking trips, I use a medium-sized Granite Gear Air Zipsack with a LokSac Opsac zipper bag inside it.  The Air Zipsack is generally water proof and can be easily hung as a bear bag overnight.  The top zipper opening of the bag zipper makes access easy and prevents smaller items from spilling everywhere.  I use the medium size in blue (16 litres).  My food for a weekend backpacking trip plus my cook kit and health items (pretty much anything with an odor) easily fit inside both of these bags with a lot of room to spare.  These are very useful items to the ultralight backpacker, reducing extra bags and weight, increasing organization and providing odor safety so critters won't be chewing through your backpack in search of your goodies.  As a bonus, Granite Gear sells each Air Zipsack inside of a small zippered flat bag.  That flat zippered bag was perfect for my personal health kit and it contains a full-size toothbrush, micro toothpaste tube plus all my other overnight trip health items.

Locsac Opsac
The Loksac zipper bag I use inside the Air Zipsack prevents odors from leaking out of the food and other supplies inside, and they are also water proof.  I plan to add a few smaller sizes of these bags for water proofing individual items inside my backpack top pocket like my cell phone and wallet.
I originally purchased the medium-size Air Zipsack based on easily carrying a 5-6 day supply of food and snacks on longer backpacking trips.  It is a bit too large for the one or two overnight backpacking trips I'm currently taking, so for future trips on I plan on purchasing an extra-extra small sized Air Zipsack (5 litres) to use for carrying food and "smellables" plus my utensils.  My cooking pot is used to only boil water and won't need to be added to the food bag nightly for bear hanging.  My food will still be bear bag friendly and it will reduce my weight a little bit and make packing and unpacking my pack a little easier.  Inside the Air Zipsack I will still use a smaller odor-proof Opsac.  
I have read online about a few horror stories where Opsac bags failed during an outing and food got eaten by critters, so I plan to carry a spare Opsac for redundancy during future backpacking trips.  Critters in Florida include bears, raccoons, squirrels, mice and ants.

Friday, May 3, 2013

Thermarest Alpine Sleeping Blanket Review

Thermarest Alpine Blanket
I slept wonderfully under my new Thermarest Alpine blanket during my Green Swamp backpacking trip!  The overnight air was 48 degrees around 5:00 AM that morning, and I never got cold during the night.  I wasn't too hot either.  I cannot say that of camping before, I was always too hot or cold, off and on all night when sleeping out.  In my case this was because the old sleeping bag I used had lost its loft.
I have always liked down comforters, having slept under one during the winters up north when I was young.  I spent several years sleeping deep in a feather bed with tons of blankets piled on top.  The down comforter was my favorite cover because there was no weight to it, unlike the heavy wool blankets of which we had too many.
What makes this Thermarest down blanket (I prefer to call it a quilt) so comfortable are the draft tubes sewn along the sides and the foot box design and its light weight.  The foot box is created by snapping the quilt together to make a pocket at the bottom that wraps underneath you while sticking your feet inside.  Your feet just stay there warm all night, they don't wander out from under the covers at all.  There are 2 snaps to really close in around your feet and lower legs.  The draft tubes along the sides of the quilt stop drafts of cold air from coming in where the quilt may get pulled back along a side as you roll around or turn over at night, something I do a lot of.  This is a large model, the regular sized measurements seemed too narrow for me, so with an extra 4 inches width and one additional ounce of fill, it seem to be just right for me, at the same price.  The 700-fill goose down was more than enough quality feathers to keep me very warm while staying lightweight.  I slept that night wearing my REI lightweight long underwear, smart wool socks and a knit cap.
Sleeping on top of my older 48 inch long RidgeRest Sleeping Pad and with my backpack tucked under my legs, I never felt the first breeze of cold air all night long.  That is with one tent door open for fresh air, as there was no wind or rain that night, just lots of thin, high clouds passing above.
I like the look of the quilt with the deep blue color and the dark gray underside.  I didn't need to use any of the straps Thermarest offers to attach around the sleeping pad.  I can see where a small sheet on the sleeping pad could be nice in warmer weather and I may investigate that at some time.  This quilt is so very light, it doesn't interfere with sleeping at all, and it packs light too, at just 24.1 ounces or 1 pound 8 ounces on my scale, a few ounces lighter than advertised.
However, for sleep comfort, my older RidgeRest pad was just too thin.  After the first 5 hours of sleep that night, whenever I rolled onto my side I woke up from a pain in my hip, a pain I didn't have anymore once I got up.  I had purchased a Z Lite SOL mattress that I did not get to use, thinking the older sleeping pad would work just fine and because it would be more convenient to carry.  Oh well, I should have taken the Z Lite SOL pad with me and will do so from now on, packed inside my backpack.  It is thicker than the older RidgeRest pad and I have slept very comfortably on one recently.   When it gets cold out, the shiny side of the Z Lite SOL should reflect a few degrees of my own heat right back to me.
I had used many different sleeping pads and air mattresses in the past, any many worked very well.  I wanted to get away from the air-filled mattresses though because they eventually fail and I don't want to mess with repair kits anymore.  That is unless the Z Lite just doesn't pad my body enough for a full nights sleep.
For the Thermarest quilt, it is the best of anything I have ever used for cover when sleeping outdoors.  It was comfortable and felt regular, just like I was sleeping in a bed at home.  For backpacking, I keep it waterproofed inside my pack in a trash compactor bag, and for sleeping, my tent will keep me dry in foul weather.  I am very pleased with my purchase and highly recommend it to backpackers looking to replace their older sleeping bags with something more comfortable and lighter.

Friday, April 26, 2013

Gossamer Gear Kumo Backpack Review

I used my new Gossamer Gear Kumo backpack on an overnight outing in Florida, and I was very pleased with how well it performed.
My actual pack load was a little heavier than the 17.88 pounds I had planned during the packing list creation due to the temperature dipping into the upper 40's at night.  The long underwear and knit hat I added put me at a pack total weight of 19.5 pounds.
Gossamer Gear Kumo.
The full pack fit me well.  The large model (weighing 14.65 ounces) was long enough to place the hip belt right at my hip (the regular size was too short for my long body).  I put the pack on without the usual grunts and gymnastic antics I used to use to hoist the (then) heavy weight onto my back.  Once strapped on, the wide shoulder pads absorbed the load and distributed the weight evenly across my shoulders.  Clicking the sternum strap together held the shoulder straps in place all day without it being too tight, once I had it adjusted.  I used the waist belt mostly out of habit, but I could feel the weight of the pack riding on my hips and that felt comfortable.  It was like I was not really wearing anything on my back.  I never felt pulled from side to side or from front to back like I have with other backpacks.  And I never experienced any balance issues or had any difficulty walking.  I also didn't have to sling my pack to the ground at the water break, I just stood there with it on like it wasn't on me at all.  Someone asked if I needed to take off my pack (for the break) and I said no thanks.  And all of this while also carrying 4.27 pounds of tent instead of carrying only 2 pounds of tent.
Getting my soft water bottles out of the side pockets was a challenge for me.  I asked for help getting them out and then back into their side pockets.  I'm not quite a fan of the soft water bottle yet.  Because my pack weighs so light I may consider carrying my old hard-sided water bottles or use lightweight recyclable water bottles just for on-trail water drinking.
When it came time to setup the tent, I liked that everything I needed was outside of the pack.  I laid down the footprint in a couple locations, then laid on top of it to chose my tent site.  The tent, poles and stakes were in the same front pack pocket and on the side of the pack, and I was able to setup the tent without unpacking anything from inside the pack.  I removed my sleeping pad from the back of the pack and laid down for an hour nap, zipped inside my tent with the tent doors open to enjoy the breeze, using the still-closed pack as a pillow.
When I awoke, I unpacked my cook kit, and brewed a cup of tea at the picnic bench.  I took my headlamp out of the top zipper pocket for when it got dark and looked at the map I had placed there for the trip.  There was still room for a few other small items in the top pocket.  Robert and his friend Gerry from the Sierra Club were napping in their separate hammocks.  I watched the clouds go by for some time, then explored the land around the ponds.
At bedtime, I opened the Kumo pack inside my tent, and dumped everything out in one bundle onto my sleeping pad and got ready for the night from there.
The next morning after breakfast I repacked the Kumo pack as I had before my trip, with the sleeping bag in the stuff sack at the bottom, then clothing, then the repair kit and finished with the food kit on top and the raincoat outside of the water proofing trash compactor bag.  I put the headlamp back in the top zipper pocket of the pack and packed my snacks in my pants pocket for the hike back to the trailhead.  Packing the tent parts back into the outside pocket was easy, even after the pack interior was loaded.  The tent poles easily slipped under the elastic cords above the side pocket, and I stood around with the pack on for a while before we left the campsite.
It still felt like I really had nothing on my back.  There was no shoulder, back or neck pain at all and I didn't need to take any pain medication during the overnight.  Perhaps the Kumo weighed a little bit, like a small daypack, but certainly not what all my gear used to weigh for an overnight camping trip.
On the walk out the backpack was a little lighter, and the pack again carried fine, even though it was slightly unbalanced left to right due to how it was packed.  There were no surprises or even small problems.  The pack just fit me and fit me well.  When we got back to the trailhead, I took off the pack and placed it in the car with one hand.  Man, was I pleased!  My congratulations to Gossamer Gear for creating such a fine, well fitting backpack!
I did apparently over-pack the bag on the back panel with my sleeping pad causing a slight tear in the mesh fabric on the seam.  Going back to the GG supplied pack pad has reduced the stress on this point.  For future trips I'll be packing my sleeping pad inside my pack, and using the supplied pad in the pad pocket, so this will not be an issue for me.
The good news:  This backpack comfortably rocks for my one or two night backpacking trips, and may serve me well for 3-4 nights in warm and clear weather.  The overall fit is good and the shoulder straps really carry the weight well without being too tight while using the sternum strap.  The hip belt is very useful in pulling the light pack weight to my hip bones, and may be even more useful with a pocket or two added for trail snacks, navigation gear or my camera.  I like this pack and had a great backpack in and out with no issues.  With adding waist belt pockets, purchasing a lighter tent and using hard-sided water bottles, I may be happily set with using my Kumo pack for a long time.
The just OK news:  For carrying bulkier items like winter jackets, and plenty of warm clothing, this 36 litre pack is just too small, while it is fine for clear weather camping in reasonably mild temperatures.  The side pockets were a little too tight for me to grasp my soft-sided water bottles and remove or replace them.  I don't typically use water bladders on overnight trips and did not use the packs bladder holder either.  The torn mesh on the back pad pocket will be left alone unless it tears more, then I'll return it to Gossamer Gear to have it repaired.

Friday, April 19, 2013

Free Rails to Trails guide with donation

I have been involved with the Rails To Trails organization since the early 1990's before we moved from Central Florida to the mountains of Colorado.  In Central Florida I participated in the setup work and a few of the early meetings on what eventually became the West Orange Trail.  I am very pleased with how the rail trails here have expanded here over the years and how well walkers and bicyclists have taken to the linear parks concept in Florida.  I both walk and bicycle some of these trails near my home.
The Rails to Trails folks are currently giving away a trail guide for making a $35 dollar donation to them.  Pick your favorite trail guide from the list on the site at this link.  Instead of a paperback book, you could instead select an E-Book guide for your Kindle or tablet.
These guides cover Rail Trails in the Southeast;  New England; Mid-Atlantic; Midwest; West; and PA,NY & NJ areas.  Pick your favorite area and support this fine organization.

While most rail trails are located in urban areas, some regional rail trails like the General Van Fleet and Withlacoochee State Trails in Florida are located far from towns and follow through woods, forests and farmland along the way.  I like travelling them just to enjoy the outdoors and have created multiple day trips along a few of the longer trails.  Rails to Trails TrailLink mapping system works very well for locating these rail trails in your area and for planning your day.  There are about 25,000 rail trail supporters in the state of Florida, and many have supported the state in creating more rail trails and with expanding connections between existing rail trails.  A lot of energy has been expended to make your rail trail trip more enjoyable.  Please check these trails out as welcome alternatives to just backpacking only in the wilds.

Friday, April 12, 2013

Green Swamp Wilderness Preserve Camping Trip

Green Swamp Wilderness Preserve West Tract
I traveled with my friend Robert on an overnight backpacking trip with several members of the Tampa Bay Sierra Club to the Green Swamp Wilderness Preserve West Tract east of Dade City, FL.  The drive over was enjoyable; Robert and I had worked together for several years and caught each other up on life's latest events.  We arrived right behind Ben, the trip organizer.  The rest of the group arrived soon and one member would arrive later in the day.  We geared-up and backpacked about half a mile along the shell road to reach the Florida Trail crossing, where we headed North over two miles, directly into a group of trail runners.  The trail runners were with the Dances With Dirt event starting from Colt Creek State Park, through the Green Swamp on various distance trail runs of up to 50 miles.  We stepped aside every few feet for a while, until the heavy breathing runners had all passed.
Concession Stand Campsite.  Nothing like what it sounds.
This section of the Florida Trail is hilly (yes, we have hills in Florida) and we came to our reserved campsite side trail at the top of one of these hills.  Small lakes had surrounded the campsite below but the water level was very low now, so we had 3 or 4 separated ponds around us.  The site had 2 picnic tables and a fire pit with a rusty horse shoe hung on the tree by the fire.  A previous group had left a stainless stock pot by the fire ring.  Everyone setup their tents and hammocks, and the faster hikers ate a quick lunch to hurry back to the trailhead to meet the late arriving backpacker.  Robert and Gerry setup their hammocks and were asleep in minutes.  I laid in my tent and snoozed about an hour in the mid-70's degree weather.  Afterwards I drank tea, checked out the lakes and watched the thin, high clouds through the afternoon.  Later on, firewood was gathered for the night.
Gerry's peaceful and laid back campsite with a view!
After a few hours the rest of the group arrived with their late-arriving member in tow.  These Sierra Club people have backpacked and camped together for several years and were constantly joking and teasing each other.  A few had "earned" funny trail names over time and the others were afraid they might earn a trail name based on their foibles.  The group took off again on a short hike a little later before dinner.
Just one of the various stoves for the trip.  Robert's wood-burning stove with blower.
We all fired up our various and functionally different stoves or cook fires and each person made and enjoyed a unique meal.  My meal was a regular box of mac and cheese, cooked with chicken in a cozy, (details in a later post).  On the menus that night were also pizza, cold pasta salad, Mountain House foods and some scrumptious homemade meals.
The Starry Sky App and the "Campfire Channel".
The rest of the night was spent listening to funny stories being told about each of the backpackers.  We built a nice fire, looked at stars in the sky using cell phone apps, talked about comets and past backpacking trips, then watched the "Campfire Channel" until we were sleepy.  Sleep was good and we awoke to a peaceful, clear morning.  Coyotes and owls had howled and hooted through the night, with sand hill cranes warbling in the morning.  Having lived in Colorado, I still find it odd to hear coyotes in Florida, though they have been here for over 20 years.  Robert said it was 52 degrees at breakfast.
Howard, Bryce, Howard, Robert, Julie, Gerry & Ben, preparing to strike camp.
Breakfast also involved everyone using multiple and different stoves and various means to boil water for coffee, and cook granola and eggs or eat cold pasta from the night before.  It didn't take very long to strike camp, and backpack back to the parking lot.  Near our campsite, we found an old kitchen stove and pieces of a building that had been there at one time, maybe the actual concession stand the camp is named for?  On the trail, we met a FT through-hiker who said he was hiking all the way to Maine on the AT when he finished through-hiking the Florida Trail.
I've never seen a "Come Back Soon" sign at a camp site before!
As for the weight of the Kumo on my back, it was like there was nothing there.  There will be some updates, but overall, my equipment performed flawlessly and I am very pleased with my first ultralight backpacking trip!
We enjoyed a group brunch at a locally-owned restaurant in Dade City, then drove home.  It was a good backpacking group of neat people and we all had a wonderful time.
Thanks to Ben for organizing such a great trip!  Robert said he hadn't thought about work for the whole weekend.  I'm looking forward to more trips with this Sierra Club group next fall.

Friday, April 5, 2013

The end of Ultralight Backpacking?

There is much online about the death of, or the end of Ultralight Backpacking.  I'm a bit surprised.  I just started and it's over with?  I find that silly actually, but after reading pages of posts, I see what the issue is.
Ultralight Backpacking has become a "bone of contention" or a sore spot to those who don't believe in it, or those who feel threatened or are abused by some who they feel preach too much.  I say if it doesn't work for you, then great.  If it does work for you, then great.  It's all just backpacking anyway.
Lite Hikers assisting the Santa Barbara National Forest to recon trails for repair after a devastating  fire in 2008.
http://www.independent.com/news/2008/may/28/fire-and-ultralight-us-forest-service-recon/
Ultralight Backpacking has come to mean a base weight (gear excluding food, fuel and water) of 10 pounds.  By purchasing a one pound tent/tarp, a one pound sleeping quilt with a one pound sleeping pad, a one pound backpack and about a pound of stove and cooking gear, it is easy to reach that base weight.  Note I said "purchase" in that sentence.  All the gear I already had and used for years weighed from three to eight times more than what I needed to buy in order to get to the base weight of 10 pounds or less.  Most of my gear was worn out and needed replacement to be effective anyway.  So I had to spend money to buy into "ultralight" gear, some of it from cottage producers like Gossamer Gear.  I already knew I couldn't buy into the typical heavier equipment because I just couldn't carry it.  I'm proud of my purchases.  And I'm not going to talk to you about them unless you ask me first.
I have been pleased to read of many areas where ultralight backpacking helps the outdoors, like in the Santa Barbara National Forest in the link above.  All backpackers I know are helpful people.  In some cases an ultralight backpacker may be able to get in quicker and is lighter on their feet, or can cover more ground in a day on the trail.
I started backpacking in the late 1960's, during the industry change from cotton canvas to manufactured fibers for tents, packs, jackets and sleeping bag fill.  I was so happy to carry my lightweight tube tent instead of a ten pound canvas one, that I never considered both ends were open and I would be eaten alive by bugs at night.  I was just glad to be free of the weight.  While I didn't read about or follow Ray Jardine until forty years later, I felt I had done well keeping up with the Boy Scouts with the gear I had.  Reading Jardine, I see his plan of "camping systems" was right on, the packing, sleeping and the cooking systems are the best ways to consider your gear for weight and usefulness.  I see him as a thought leader who helped bring Ultralight Backpacking into existence.  Ray Jardine was a person who talked a lot about what works for him, but not necessarily for me.
Gramma Gatewood, Hiking the AT in 1958, 1960 and 1963.
If you look back into the 1950's, Grandma Gatewood hiked the Appalachian Trail with about the same weight of gear as modern-day ultralight backpackers, but unlike Grandma Gatewood I didn't have these things laying around my house, so I purchased them.  If I could sew, I may have made some of my gear, but I don't know how to sew and didn't want to take the time to learn how.  With a 40 hour weekly job plus family, school events and more it is hard enough to balance my little free time with being in the outdoors.
The outdoor skills I have used for years still work for me; I know how to safely select a sleeping space, pitch a tent or a tarp, how to build a fire, cut down a tree, clean and take care of my body, watch for snakes and wildlife, navigate off trail with a map and compass, deal with rain and severe weather, use basic first aid, feel comfortable outdoors and even lead a crew.  Called "Black Arts" by some, these skills are necessary to anyone interested in more than an overnight trip into a local park.  And they have nothing specific to do with "Ultralight Backpacking".
Adding to those skills Ultralight Backpackers rise, strike camp and backpack an hour before breakfast.  They eat lunch while taking a long mid day break, and later have an early dinner while still on the trail.  Then they hike until just before dark to make camp.  That increases your daily mileage and leaves less of a mess "in camp" to deal with.  That works for me, but maybe not for you.  And that's OK.
The real truth is we all must "hike our own hike" and use the tools that work best for us.  In my very personal way, that is to reduce my pack weight to make it possible for me to hike all day long without pain.  I have shoulder, back and leg injuries that make carrying a heavy pack nearly impossible.  And I'm over 55 years old, so I don't have the strength to sling fifty to sixty pounds over my shoulder and walk all day any more.  And that's OK.
Twenty five years ago we didn't have ultralight anything, so I had to quit doing something I loved.  Now I can take it back up again, and even dream of making a through-hike a possibility.

Tuesday, April 2, 2013

I Love April Fools Day

April Fools day is one of my favorite non-holidays each Spring.  When younger, I took part in many April Fools day events, most playing a joke on coworkers.  There are several of those "really funny moments" I could bring up, but instead, I found a really cute and funny April Fools joke online from REI this morning, and just have to share it with you.

REI Adventure Kitten
I love kittens, and this one is adorable.  I'm pleased REI has a good sense of humor.  They may have some aged and humorous footage of some of our climbing wall foibles to share too!
Here's a link to check for more fun about this picture.  
Enjoy, smile and have a happy day!